Report Configurations
- Creating reports in Jaspersoft Studio
- Managing reports in VeloxFactory
- Data adapters for dyn. data control
Creating reports in Jaspersoft Studio
VeloxFactory renders reports defined as .jrxml files — the native format of JasperReports. These files are designed in Jaspersoft Studio, a free desktop IDE built specifically for this purpose. This page explains how to set up a .jrxml file so that VeloxFactory can analyse it correctly, register all its parts, and render it reliably.
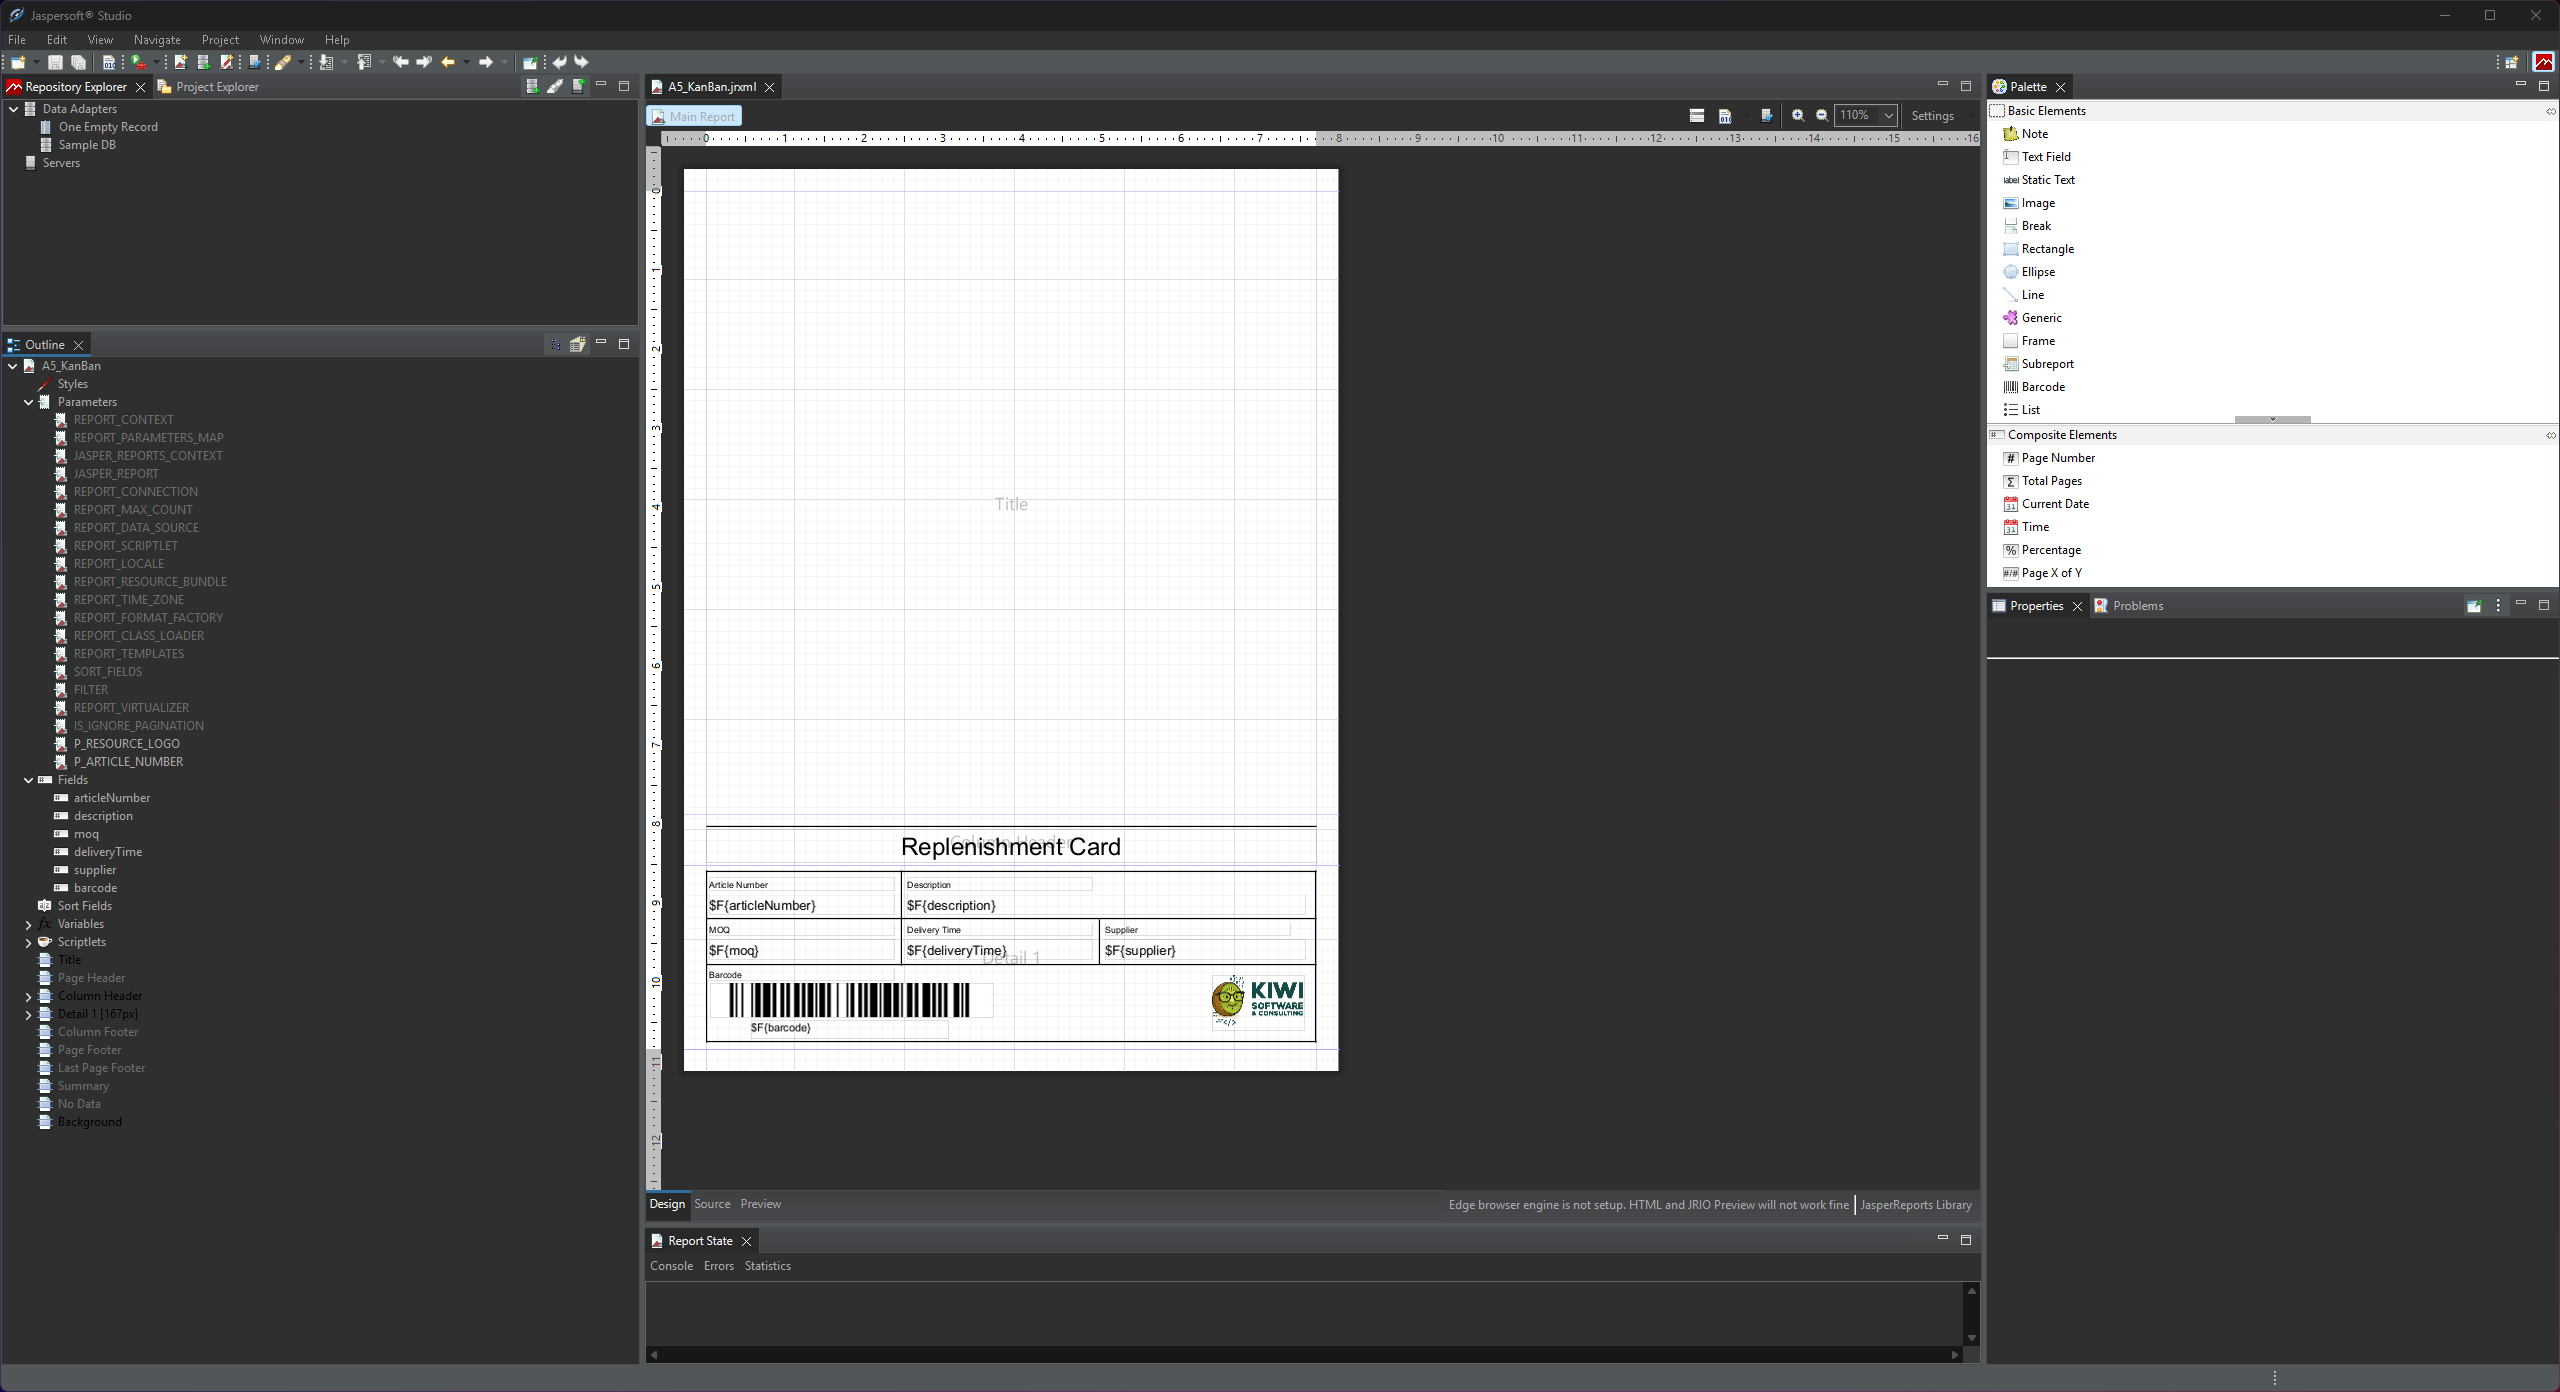
Jaspersoft Studio
Jaspersoft Studio is an Eclipse-based visual report designer. You use it to lay out the report template — define what data goes where on the page, how it is formatted, and which inputs the report expects. The resulting .jrxml file is then uploaded to VeloxFactory, which takes over everything from there: storing it, analysing it, connecting it to a data source, and rendering it on demand.
The division of responsibilities between Jaspersoft Studio and VeloxFactory is clear:
- Jaspersoft Studio defines the layout, the parameters, the fields, and the visual design of the report.
- VeloxFactory manages the SQL query, the data connection, and the actual rendering at runtime.
This means you will see a <queryString> element in Jaspersoft Studio — but as explained below, you leave it empty. VeloxFactory supplies the query separately.
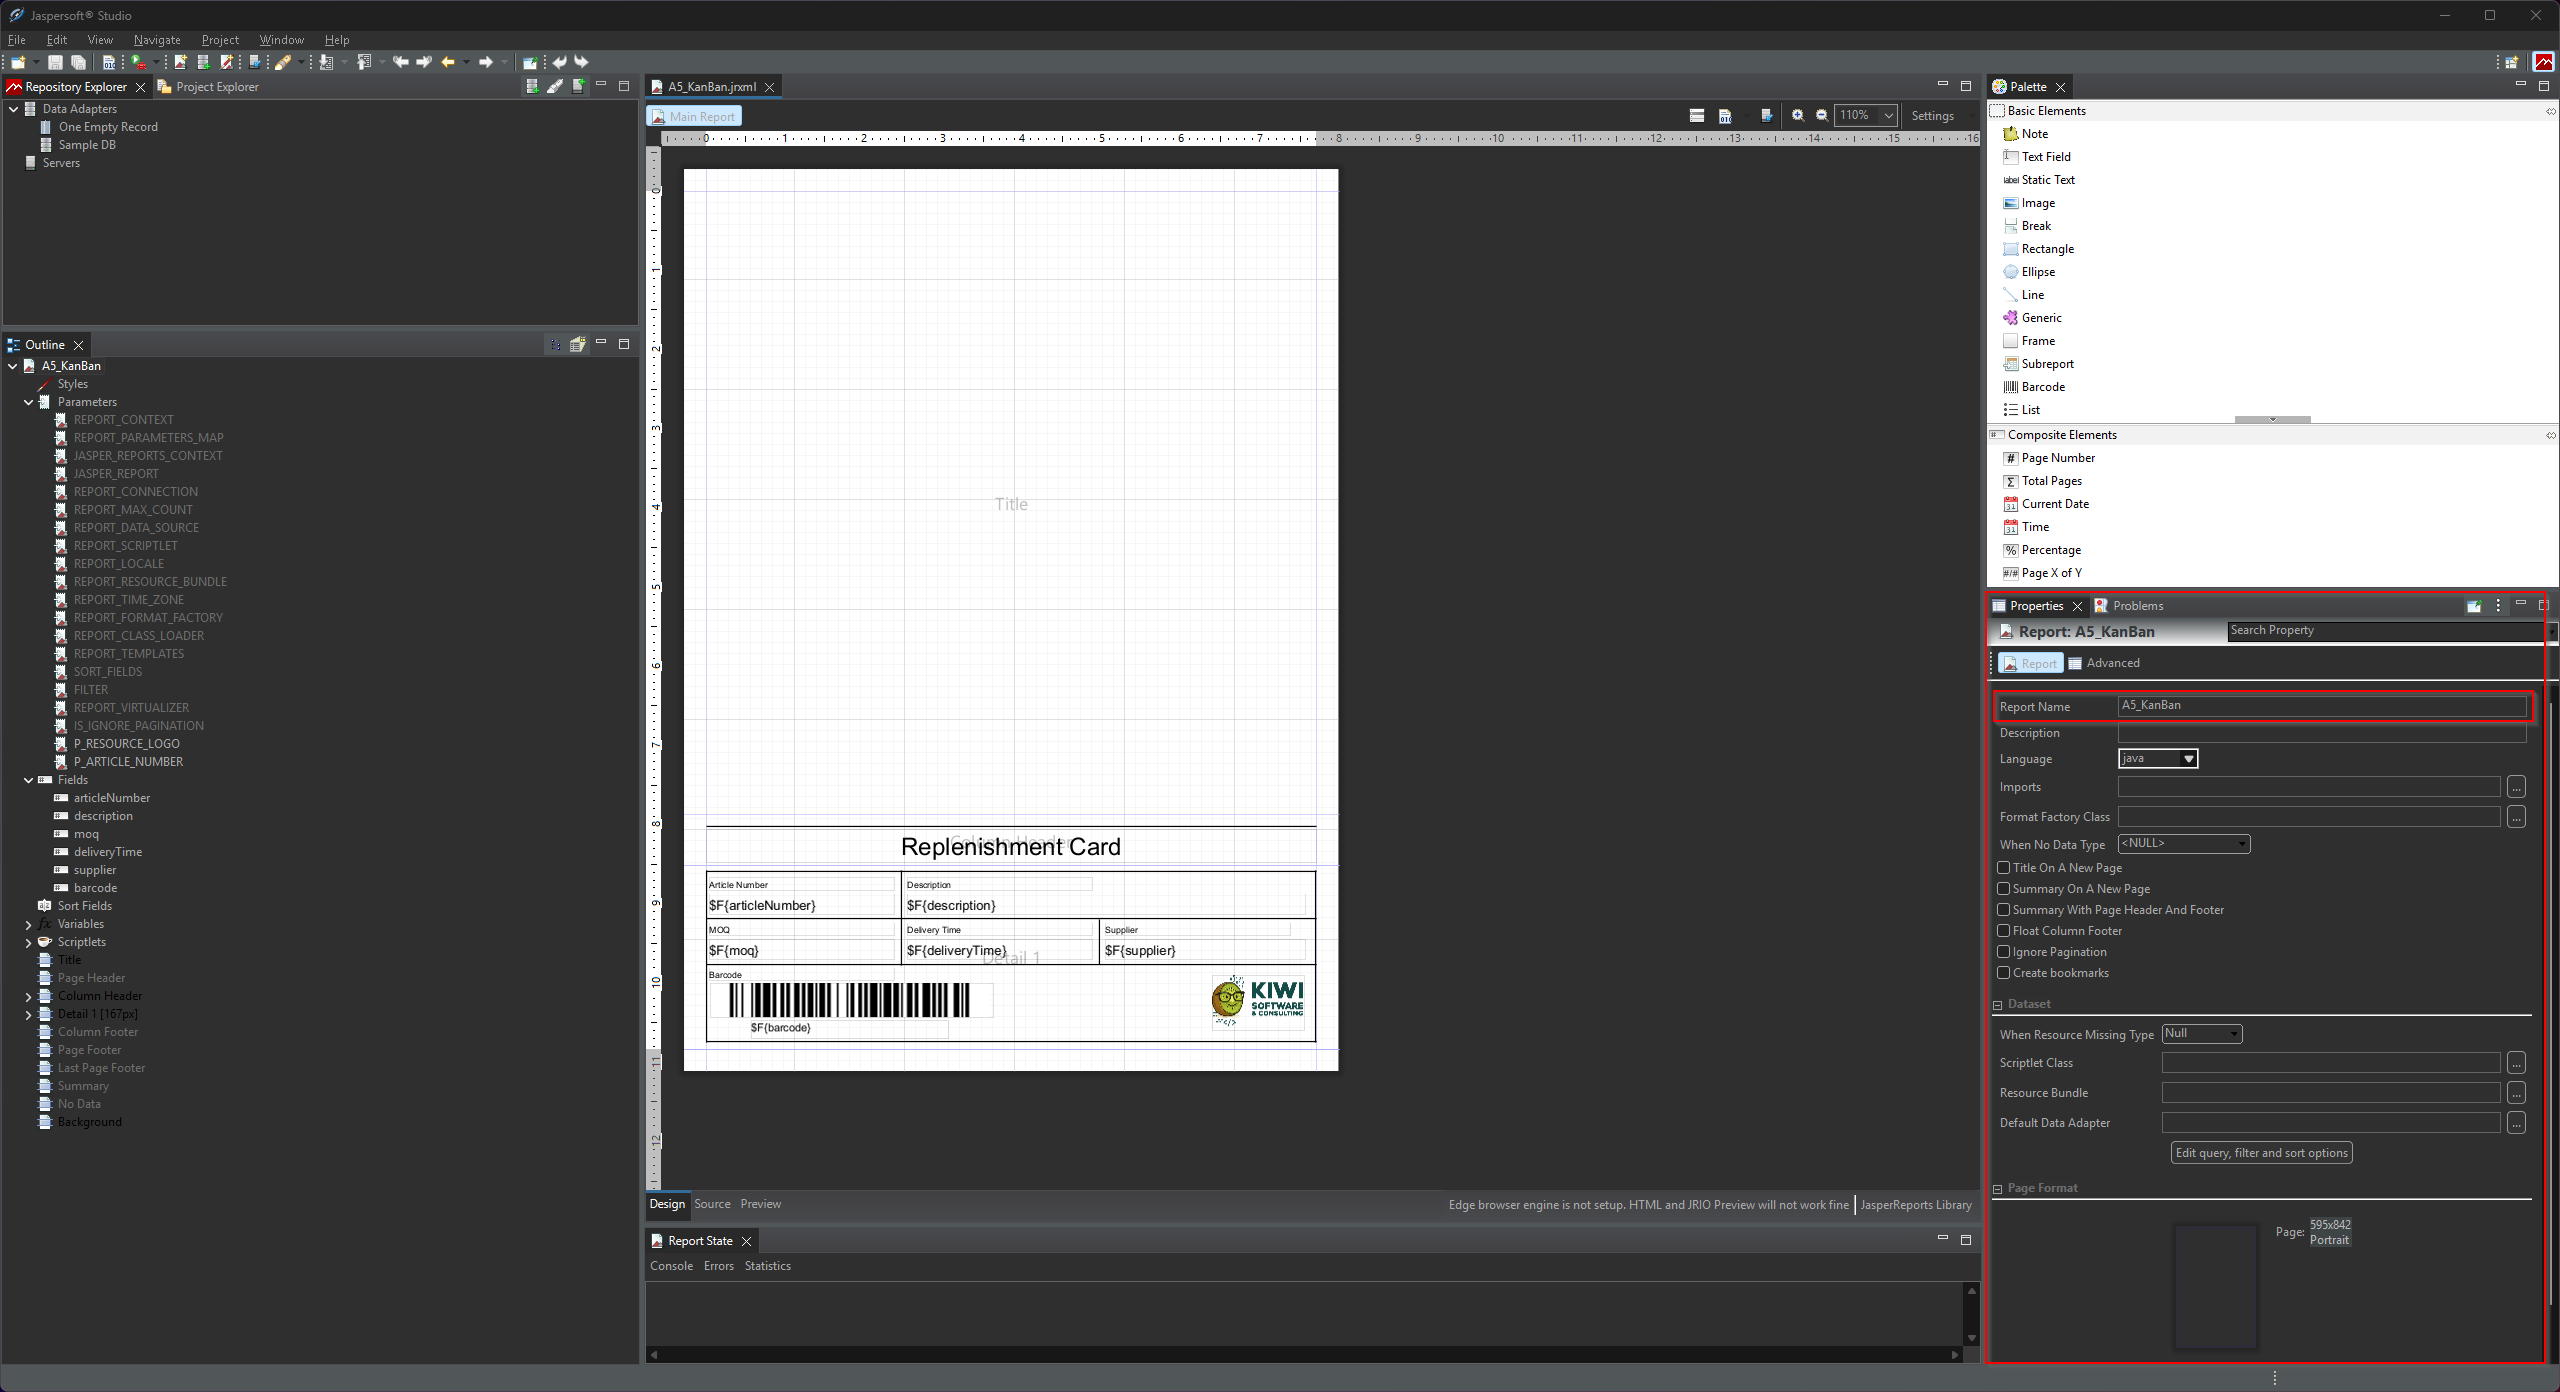
The Report Name
Every Jaspersoft Studio project has a Report Name — the name attribute on the root <jasperReport> element. This is not just a filename: VeloxFactory reads it directly from the .jrxml on upload and stores it as report_name on the ReportConfig.
<jasperReport ... name="A5_KanBan" ...>
This name must be unique across all report configurations in VeloxFactory. If you try to upload a .jrxml whose report name already exists, the upload will be rejected. The same applies to the file name itself.
Parameters
Parameters are input values passed into the report at render time. They are used inside the report layout via $P{PARAMETER_NAME} expressions — for example to display a customer name in the title, filter by a date range, or pass a document number into a barcode expression.
You define parameters in Jaspersoft Studio via the Report Inspector → Parameters section. Each parameter has a name and a Java data type.
Custom Properties: exampleValue and required
VeloxFactory reads two custom properties from each parameter definition: exampleValue and required. These are not standard Jaspersoft features — they are custom <property> elements you add manually to the parameter in the .jrxml. VeloxFactory's analyser (JasperFunctions::analyzeReportFile) extracts them on upload.
| Property | Value type | Purpose |
|---|---|---|
exampleValue |
string | A representative value used when rendering a preview of the report without real data. Also pre-fills the parameter input in the frontend render form. |
required |
boolean (true / false) |
Whether this parameter must be provided in every render request. VeloxFactory rejects render requests that are missing a required parameter. |
Both properties can also be set or updated manually in VeloxFactory after upload — they do not have to come from the .jrxml. But embedding them in the file means they are automatically picked up every time the report is uploaded or re-uploaded.
To add these properties in Jaspersoft Studio, open the parameter in the Report Inspector, switch to the Properties panel, and add a new custom property via the green + button.

Supported Data Types
VeloxFactory supports the following Java class types for parameters. The type determines how the input field is rendered in the frontend and how the value is handled at render time.
| Java class | Frontend input | Notes |
|---|---|---|
java.lang.String |
Text field | General-purpose text input |
java.lang.Boolean |
Toggle | Rendered as a checkbox/toggle switch |
java.lang.Short |
Integer input | Range: −32,768 to 32,767 |
java.lang.Integer |
Integer input | Range: −2,147,483,648 to 2,147,483,647 |
java.lang.Long |
Integer input | 64-bit integer |
java.lang.Float |
Decimal input | Single-precision floating point |
java.lang.Double |
Decimal input | Double-precision floating point |
java.math.BigDecimal |
Decimal input | Arbitrary-precision decimal; preferred for monetary values |
java.sql.Date |
Date picker | Date only (no time) |
java.util.Date |
Date picker | Date only (no time) |
java.sql.Time |
Time picker | Time only (HH:mm) |
java.sql.Timestamp |
Date + time picker | Combined date and time (datetime-local) |
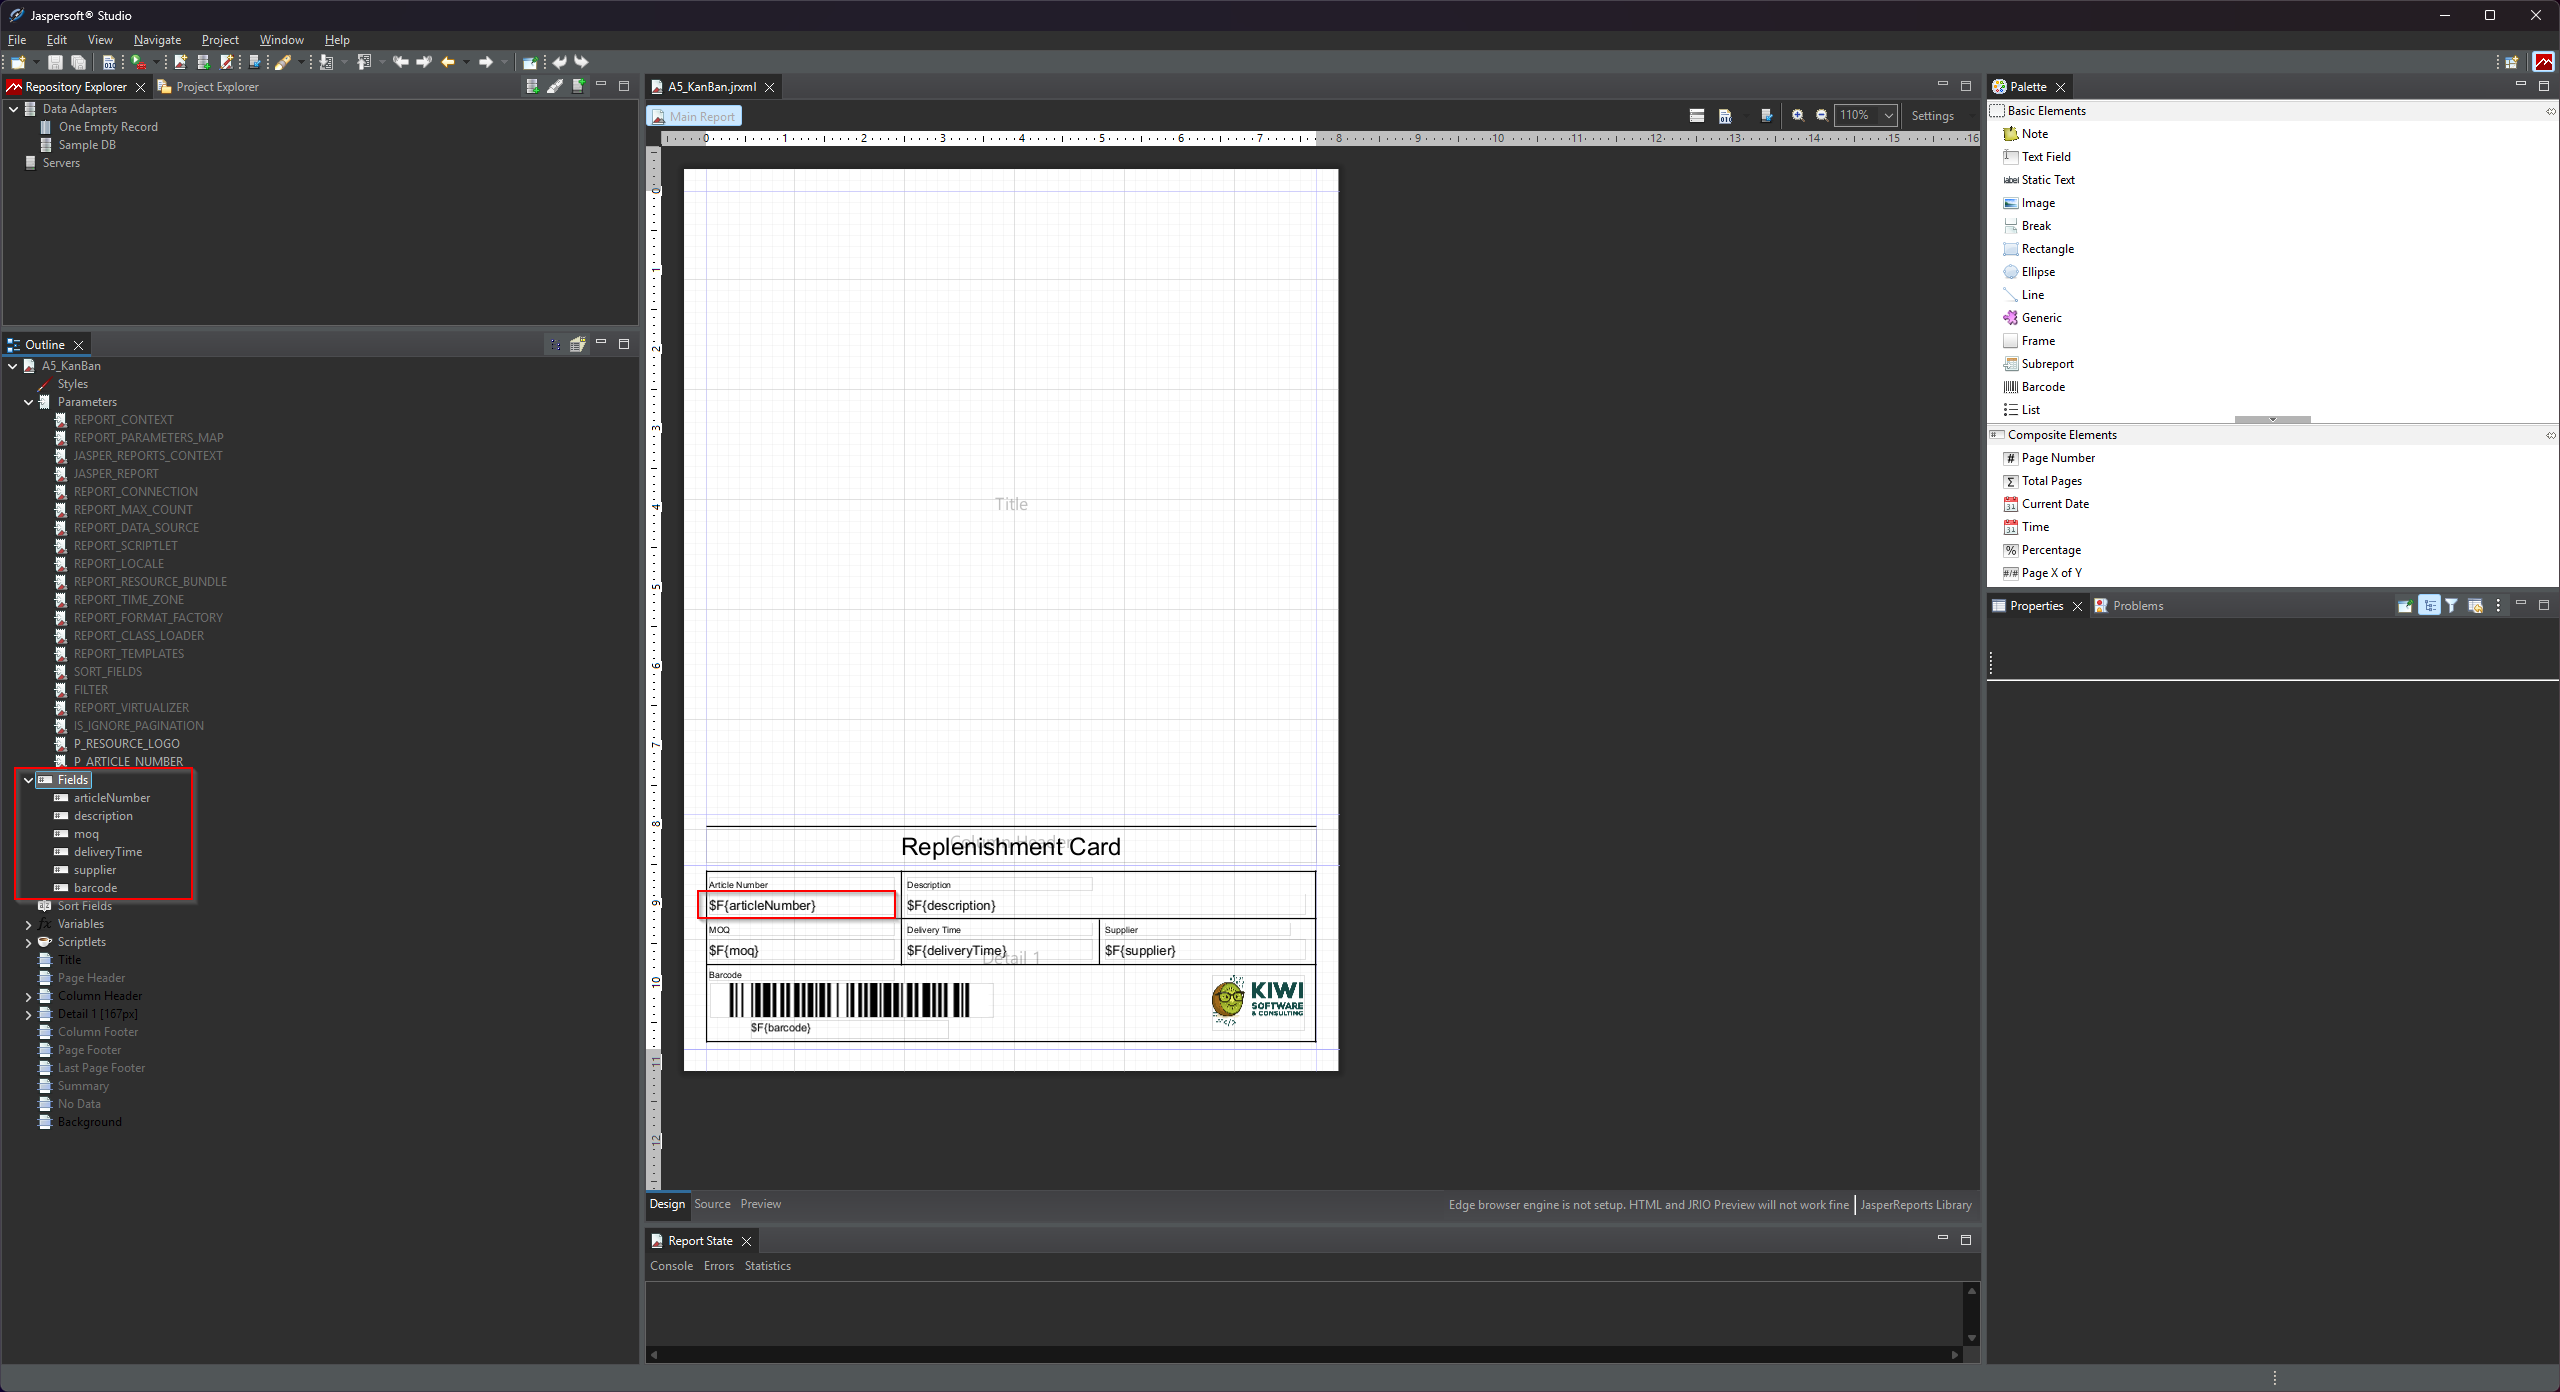
Fields
Fields represent the data columns that populate the report's detail band — the repeating section that produces one row of output per data record. Each field corresponds to a column in the SQL query result (when using a live connection) or a key in the data array delivered at render time via the API.
You define fields in Jaspersoft Studio via the Report Inspector → Fields section. In the report layout, you reference them via $F{FIELD_NAME} expressions inside text fields in the detail band.
Custom Property: exampleValue
Fields support one custom property: exampleValue. It works the same way as for parameters — a representative value used when rendering a preview of the report without a live data connection. VeloxFactory collects these example values and assembles a synthetic data row from them for preview rendering.
You add exampleValue to a field the same way as for parameters: open the field in the Report Inspector, go to the Properties tab, and add the custom property.
Fields support the same Java data types as parameters (see the table above). Use the type that matches the column type your SQL query or data array will produce.
Using Parameters as SQL Variables
When a ReportConfig has a ReportConnectionConfig assigned, VeloxFactory executes the SQL query defined in the report configuration against that live database connection. Parameters passed in the render request are available as named bindings inside that query — using the standard :parameterName syntax from Laravel's Eloquent database layer.
This means you can reference any parameter directly in your SQL to filter, sort, or limit the result set:
SELECT
    article_number  AS articleNumber,
    description,
    moq,
    delivery_time   AS deliveryTime,
    supplier,
    barcode
FROM articles
WHERE article_number = :P_ARTICLE_NUMBER
In this example, :P_ARTICLE_NUMBER is replaced at query execution time with the value of the P_ARTICLE_NUMBER parameter from the render request. The binding is handled natively by PDO — values are passed as proper prepared statement parameters, not interpolated as strings.
:name placeholders before execution and silently drops any parameters that are not needed. Passing extra parameters in the render request will never cause a query error.
The parameter name in the query binding must match the parameter name exactly as defined in the .jrxml — including case. For example, a parameter named P_ARTICLE_NUMBER in the report must be referenced as :P_ARTICLE_NUMBER in the SQL query.
You can use as many parameters as needed across WHERE, ORDER BY, LIMIT, or any other clause that accepts a value binding. Note that named bindings cannot be used for identifiers like table or column names — only for values.
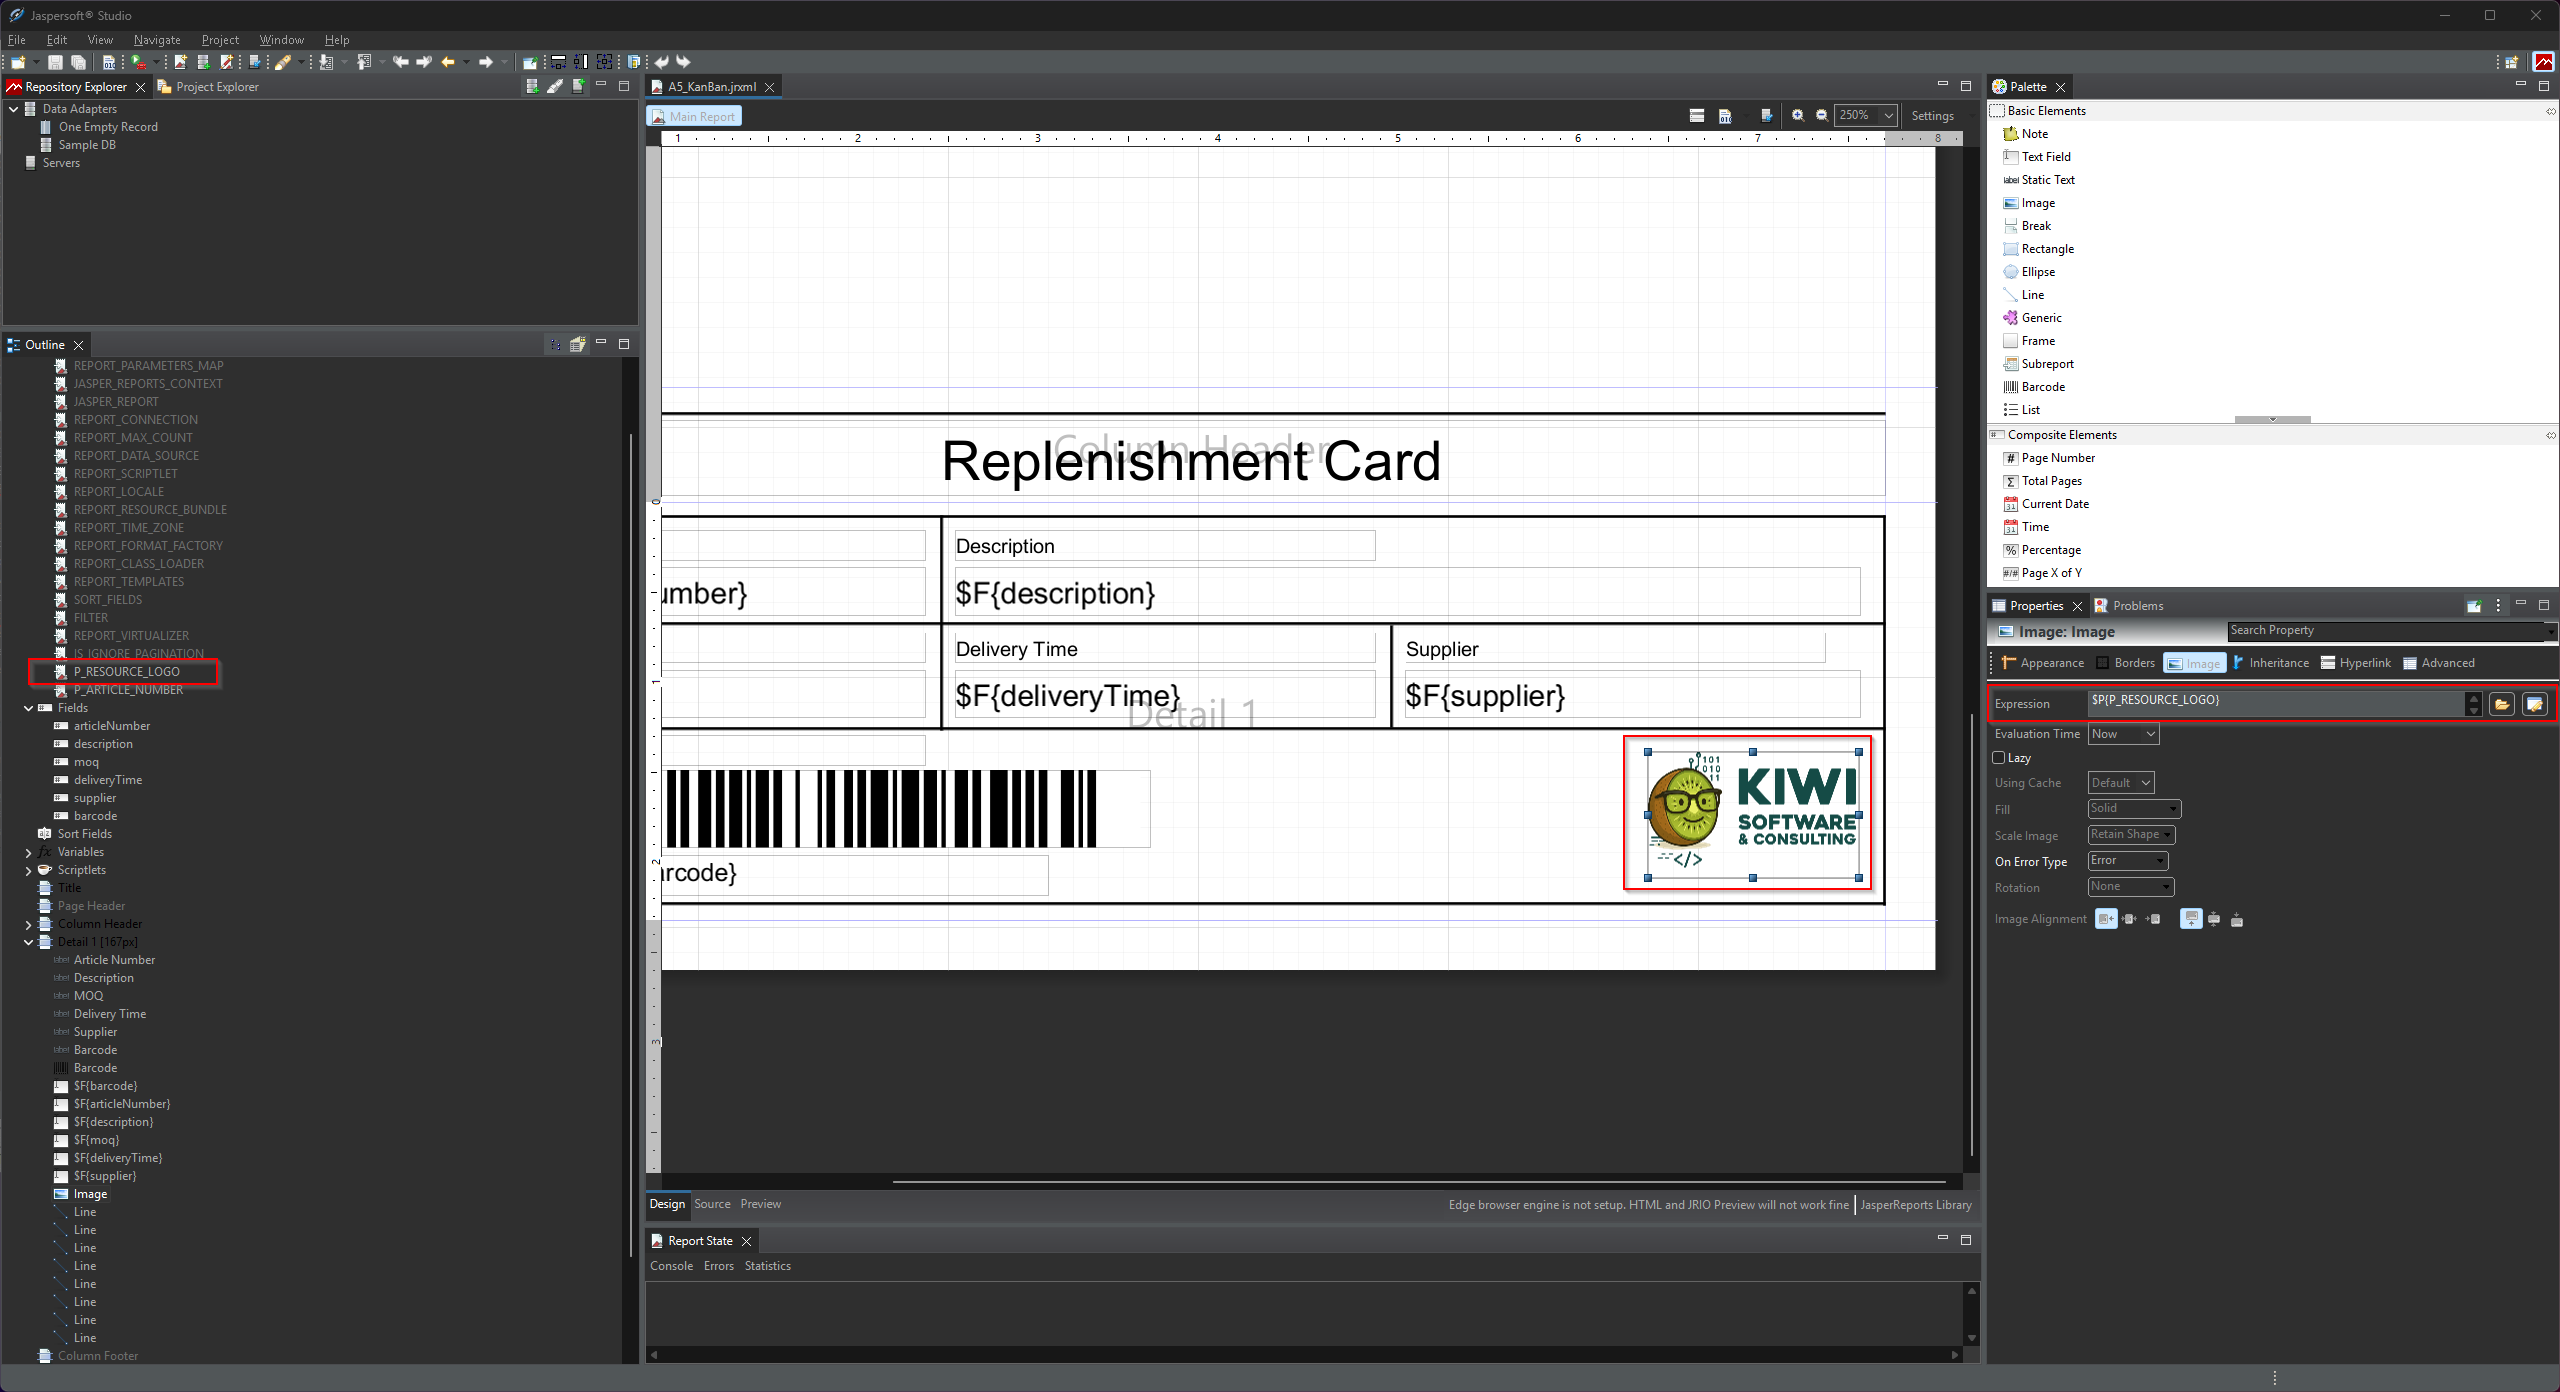
Resources (Images and Logos)
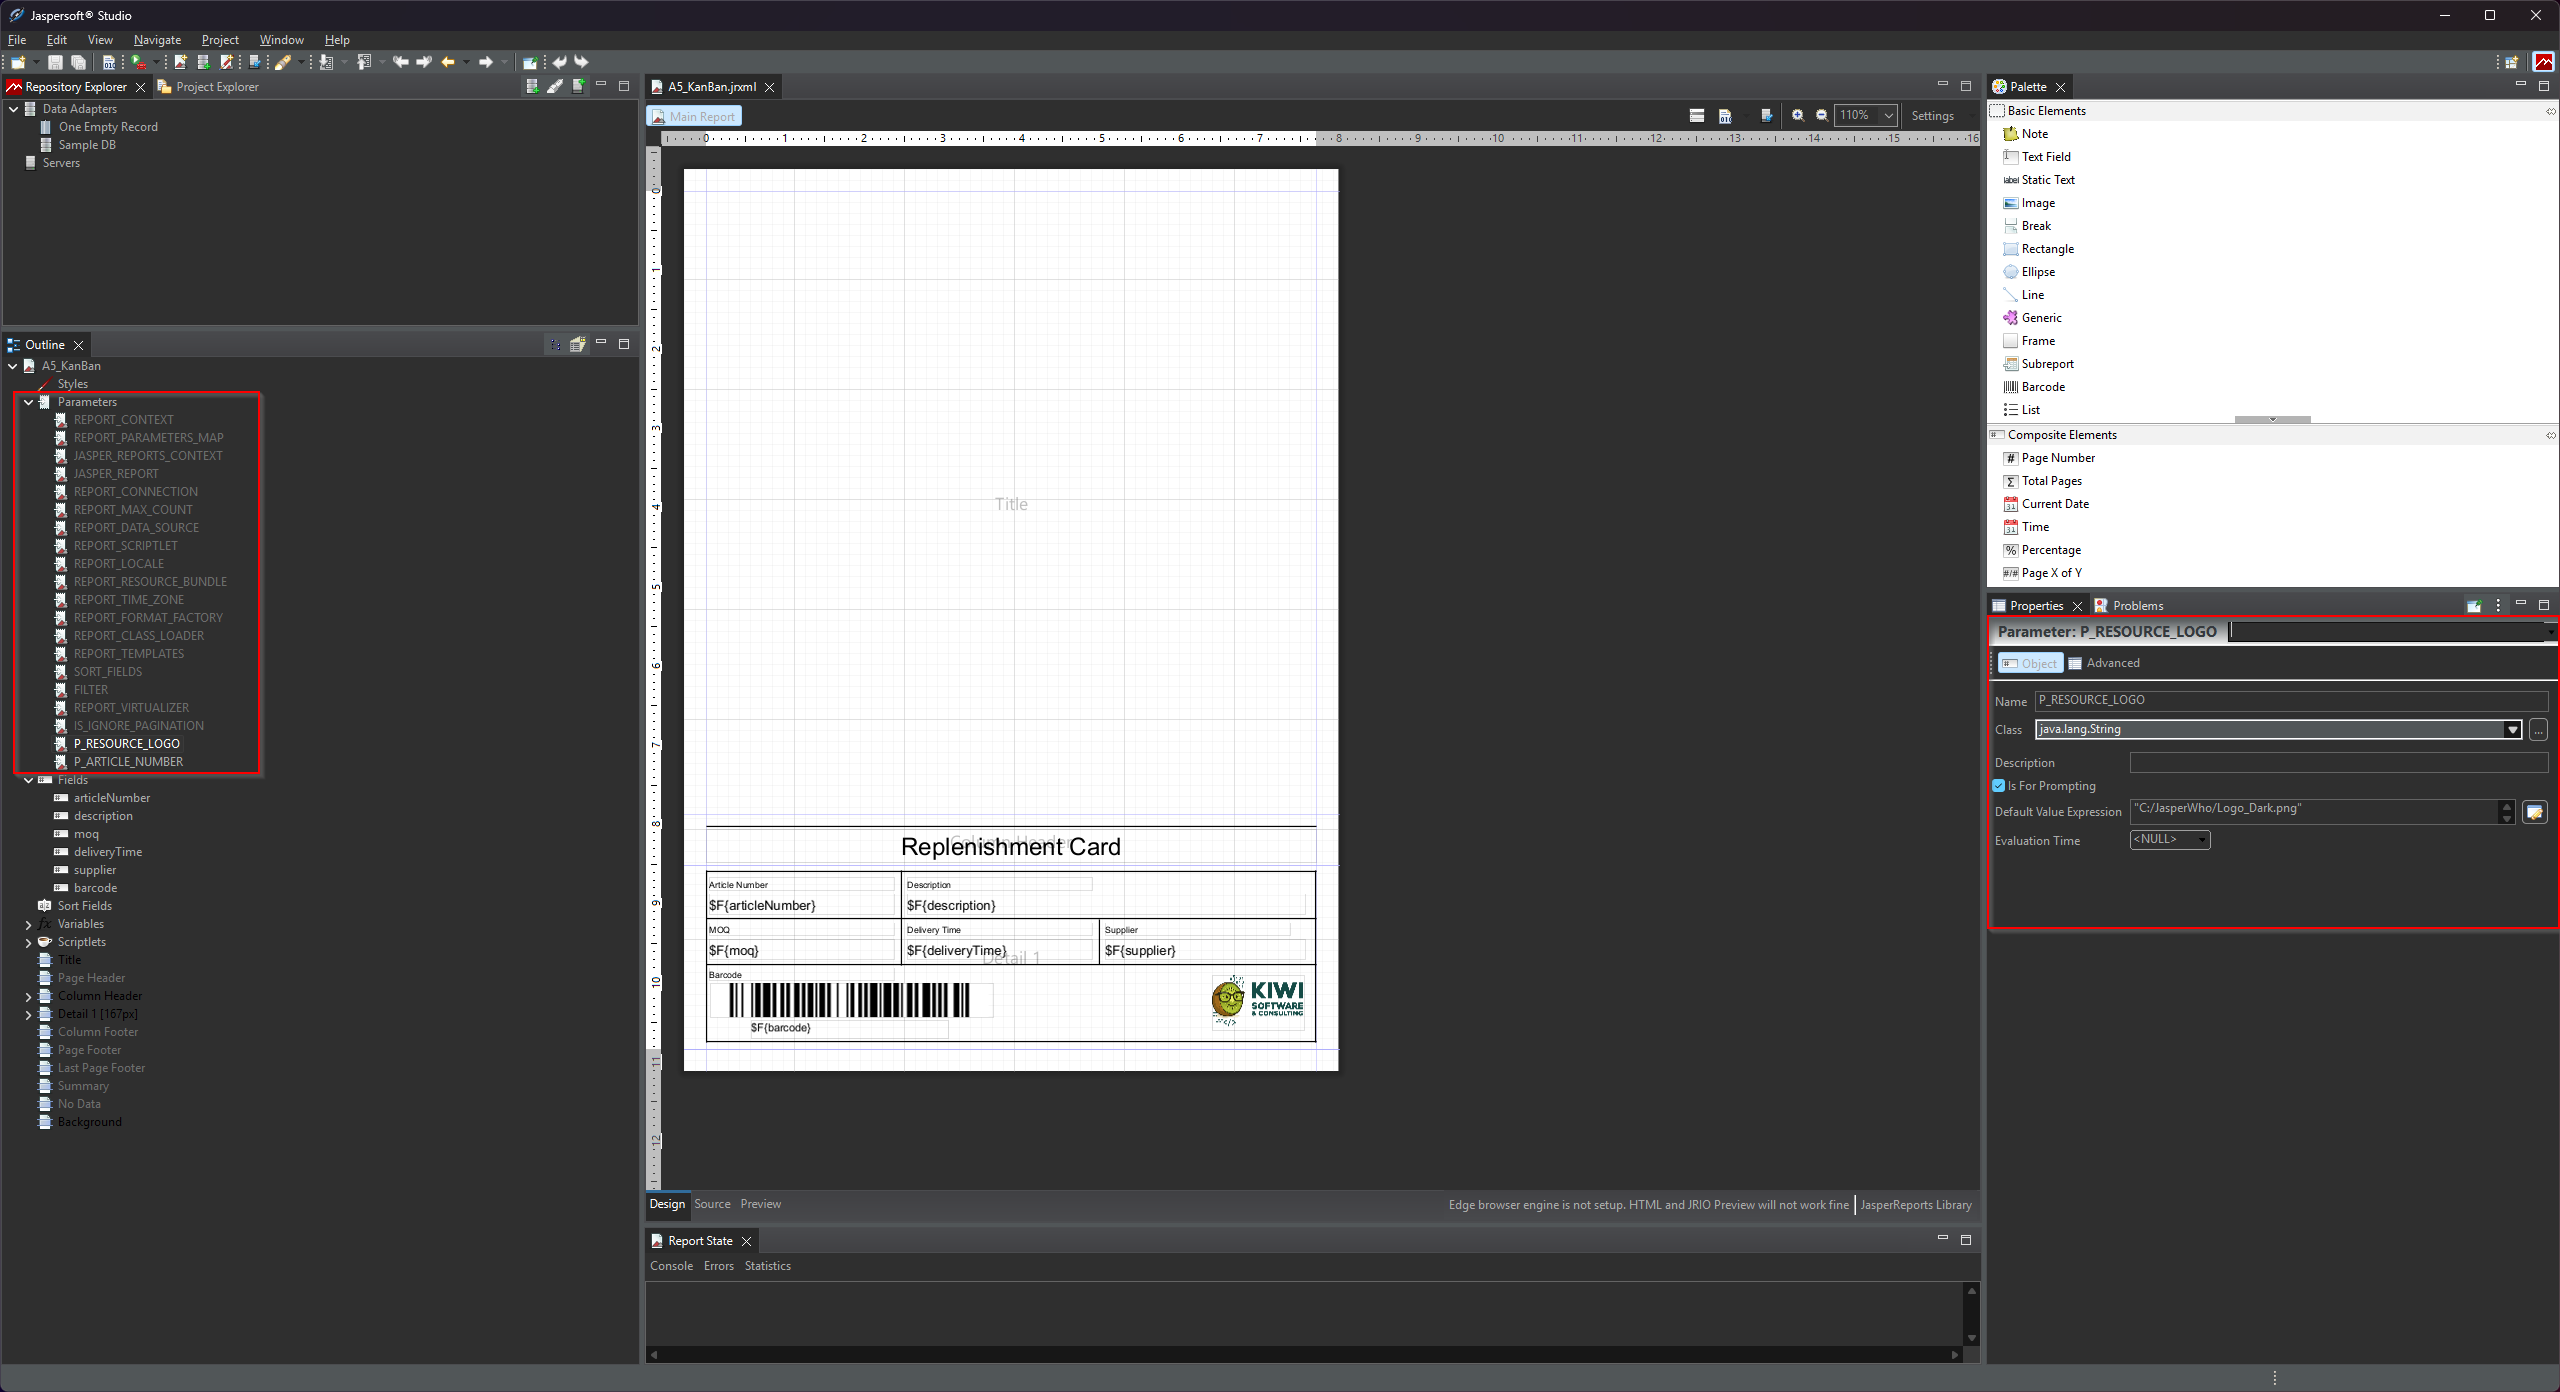
If your report contains images — a company logo, a header graphic, a product photo — these are defined as resource parameters in the .jrxml. VeloxFactory detects them automatically on upload and creates a ReportResource record for each one.
The naming convention is strict: every resource parameter must start with P_RESOURCE_ and must have the Java class java.lang.String. At render time, VeloxFactory replaces the parameter value with the actual file path of the uploaded image on the server.
<!-- Resource parameter: logo image -->
<parameter name="P_RESOURCE_LOGO" class="java.lang.String">
    <defaultValueExpression><![CDATA["C:/VeloxFactory/Logo_Dark.png"]]></defaultValueExpression>
</parameter>
In the report layout, you then bind this parameter to an image element:
<image>
    <reportElement x="460" y="100" width="84" height="50" uuid="..."/>
    <imageExpression><![CDATA[$P{P_RESOURCE_LOGO}]]></imageExpression>
</image>
The <defaultValueExpression> is used only in Jaspersoft Studio for design-time preview purposes. VeloxFactory ignores it at render time — it always uses the uploaded file path instead. You can point it to a local file on your design machine.
After uploading the .jrxml, you must go to the Resources section of the report configuration in VeloxFactory and upload the actual image file for each detected resource. A report cannot be rendered until all its resources have files assigned.
The Detail Band
The detail band is the repeating section of the report — the part that outputs one row per data record. If your report displays a list of items, a table, or any kind of repeating structure, it lives in the detail band.
VeloxFactory checks whether a detail band is present when analysing the .jrxml:
- If a detail band exists, VeloxFactory expects data to be provided at render time — either via a live SQL connection or via the
dataarray in the API request. - If no detail band exists, the report is treated as a static layout — no data is needed, only parameters.
$F{...}). A detail band that exists but displays no field data will be rejected on upload. VeloxFactory uses the presence of text fields in the band as a basic integrity check.
Reports without a detail band are perfectly valid — they are useful for documents like cover pages, summary sheets, or any report whose content is entirely driven by parameters rather than repeated rows.
The SQL Query
Jaspersoft Studio has a built-in <queryString> element where you would normally write the SQL query for the report. In VeloxFactory, this element is ignored. The SQL query is instead defined and stored directly in VeloxFactory as part of the ReportConfig — not in the .jrxml file.
This means you should leave the <queryString> empty when creating a .jrxml for VeloxFactory:
<queryString>
    <![CDATA[]]>
</queryString>
You write the actual SQL query in VeloxFactory after uploading the report, in the Query field of the report configuration. This design keeps the query where it can be managed, versioned, and changed without touching the report template file.
The query result columns must match the field names you defined in the .jrxml. For example, if your report has a field named articleNumber, your SQL query must return a column called articleNumber.
The Data Adapter
Jaspersoft Studio uses Data Adapters to connect to a live database so you can preview your report during design. This is entirely a design-time feature — the data adapter you configure in Jaspersoft Studio has no effect in VeloxFactory and is not stored in the .jrxml.
At render time, VeloxFactory always uses its own internal array-based adapter to pass data to JasperReports. Whether that data comes from an SQL query executed against a ReportConnectionConfig or from a data array in the API request, VeloxFactory always handles the data handoff itself.
You still benefit from configuring a data adapter in Jaspersoft Studio during development — it lets you see a realistic preview while designing the layout. Just be aware that the adapter configuration stays local to your machine.
Annotated Example
The following is a complete, minimal .jrxml that demonstrates everything discussed on this page. It is the actual A5_KanBan report included in the VeloxFactory demo. Inline comments explain each relevant element.
<?xml version="1.0" encoding="UTF-8"?>
<!-- Created with Jaspersoft Studio version 6.21.5 -->

<jasperReport
    xmlns="http://jasperreports.sourceforge.net/jasperreports"
    xmlns:xsi="http://www.w3.org/2001/XMLSchema-instance"
    xsi:schemaLocation="..."

    name="A5_KanBan"         <!-- Report Name — becomes report_name in VeloxFactory. Must be unique. -->
    pageWidth="595"          <!-- Page dimensions in Jasper pixels (1px = 1/72 inch).              -->
    pageHeight="842"         <!-- VeloxFactory converts these to mm on upload.                       -->
    ...>


    <!-- ═══════════════════════════════════════════════════════════════════
         RESOURCE PARAMETER
         Name starts with P_RESOURCE_ and class is java.lang.String.
         VeloxFactory detects this as a resource (image/logo), not a parameter.
         The defaultValueExpression points to a local file for Studio preview —
         VeloxFactory replaces it at render time with the uploaded file path.
         ═══════════════════════════════════════════════════════════════════ -->
    <parameter name="P_RESOURCE_LOGO" class="java.lang.String">
        <defaultValueExpression><![CDATA["C:/VeloxFactory/Logo_Dark.png"]]></defaultValueExpression>
    </parameter>


    <!-- ═══════════════════════════════════════════════════════════════════
         REGULAR PARAMETER
         P_ARTICLE_NUMBER is a user-supplied input value passed at render time.
         exampleValue  → used for preview rendering and pre-fills the frontend form.
         required      → omitting this parameter in a render request will cause a 422 error.
         ═══════════════════════════════════════════════════════════════════ -->
    <parameter name="P_ARTICLE_NUMBER" class="java.lang.String">
        <property name="exampleValue" value="4561287-154"/>
        <property name="required"     value="true"/>
    </parameter>


    <!-- ═══════════════════════════════════════════════════════════════════
         QUERY STRING — leave empty.
         The SQL query is defined in VeloxFactory, not here.
         ═══════════════════════════════════════════════════════════════════ -->
    <queryString>
        <![CDATA[]]>
    </queryString>


    <!-- ═══════════════════════════════════════════════════════════════════
         FIELDS
         Each field maps to a column in the SQL result or a key in the data array.
         exampleValue → used for preview rendering when no live data is available.
         ═══════════════════════════════════════════════════════════════════ -->
    <field name="articleNumber" class="java.lang.String">
        <property name="exampleValue" value="1868745-584"/>
    </field>

    <field name="description" class="java.lang.String">
        <property name="exampleValue" value="Packing Carton Size 1 - 200x150x50mm"/>
    </field>

    <field name="moq" class="java.lang.Integer">
        <property name="exampleValue" value="250"/>
    </field>

    <field name="deliveryTime" class="java.lang.String">
        <property name="exampleValue" value="3 Days"/>
    </field>

    <field name="supplier" class="java.lang.String">
        <property name="exampleValue" value="Ninghao Packaging"/>
    </field>

    <field name="barcode" class="java.lang.String">
        <property name="exampleValue" value="5698532145712"/>
    </field>


    <!-- ═══════════════════════════════════════════════════════════════════
         DETAIL BAND
         The repeating section — one iteration per data row.
         Must contain at least one <textField> using a $F{...} expression,
         otherwise VeloxFactory rejects the file on upload.
         The image element uses $P{P_RESOURCE_LOGO} — VeloxFactory resolves
         this to the uploaded resource file at render time.
         ═══════════════════════════════════════════════════════════════════ -->
    <detail>
        <band height="167" splitType="Stretch">

            <!-- Field values referenced via $F{...} expressions -->
            <textField>
                <textFieldExpression><![CDATA[$F{articleNumber}]]></textFieldExpression>
            </textField>

            <textField>
                <textFieldExpression><![CDATA[$F{description}]]></textFieldExpression>
            </textField>

            <!-- Resource image: bound to the P_RESOURCE_LOGO parameter -->
            <image>
                <imageExpression><![CDATA[$P{P_RESOURCE_LOGO}]]></imageExpression>
            </image>

        </band>
    </detail>

</jasperReport>
.jrxml contains many additional attributes, layout elements, and Studio-specific property annotations. The elements shown here are the ones VeloxFactory actively reads and acts on — everything else is passed through to JasperReports as-is.
Pre-Upload Checklist
Before uploading a .jrxml to VeloxFactory, verify the following:
- The Report Name (
nameattribute on<jasperReport>) is set, descriptive, and unique. - All resource parameters follow the
P_RESOURCE_naming convention and have classjava.lang.String. - All regular parameters have
exampleValueandrequiredcustom properties set where applicable. - All fields have an
exampleValuecustom property set. - The
<queryString>is empty — the SQL is managed in VeloxFactory. - If the report has a detail band, it contains at least one
<textField>with a$F{...}expression. - The report previews correctly in Jaspersoft Studio using the local data adapter — this confirms the layout and expressions are valid before upload.
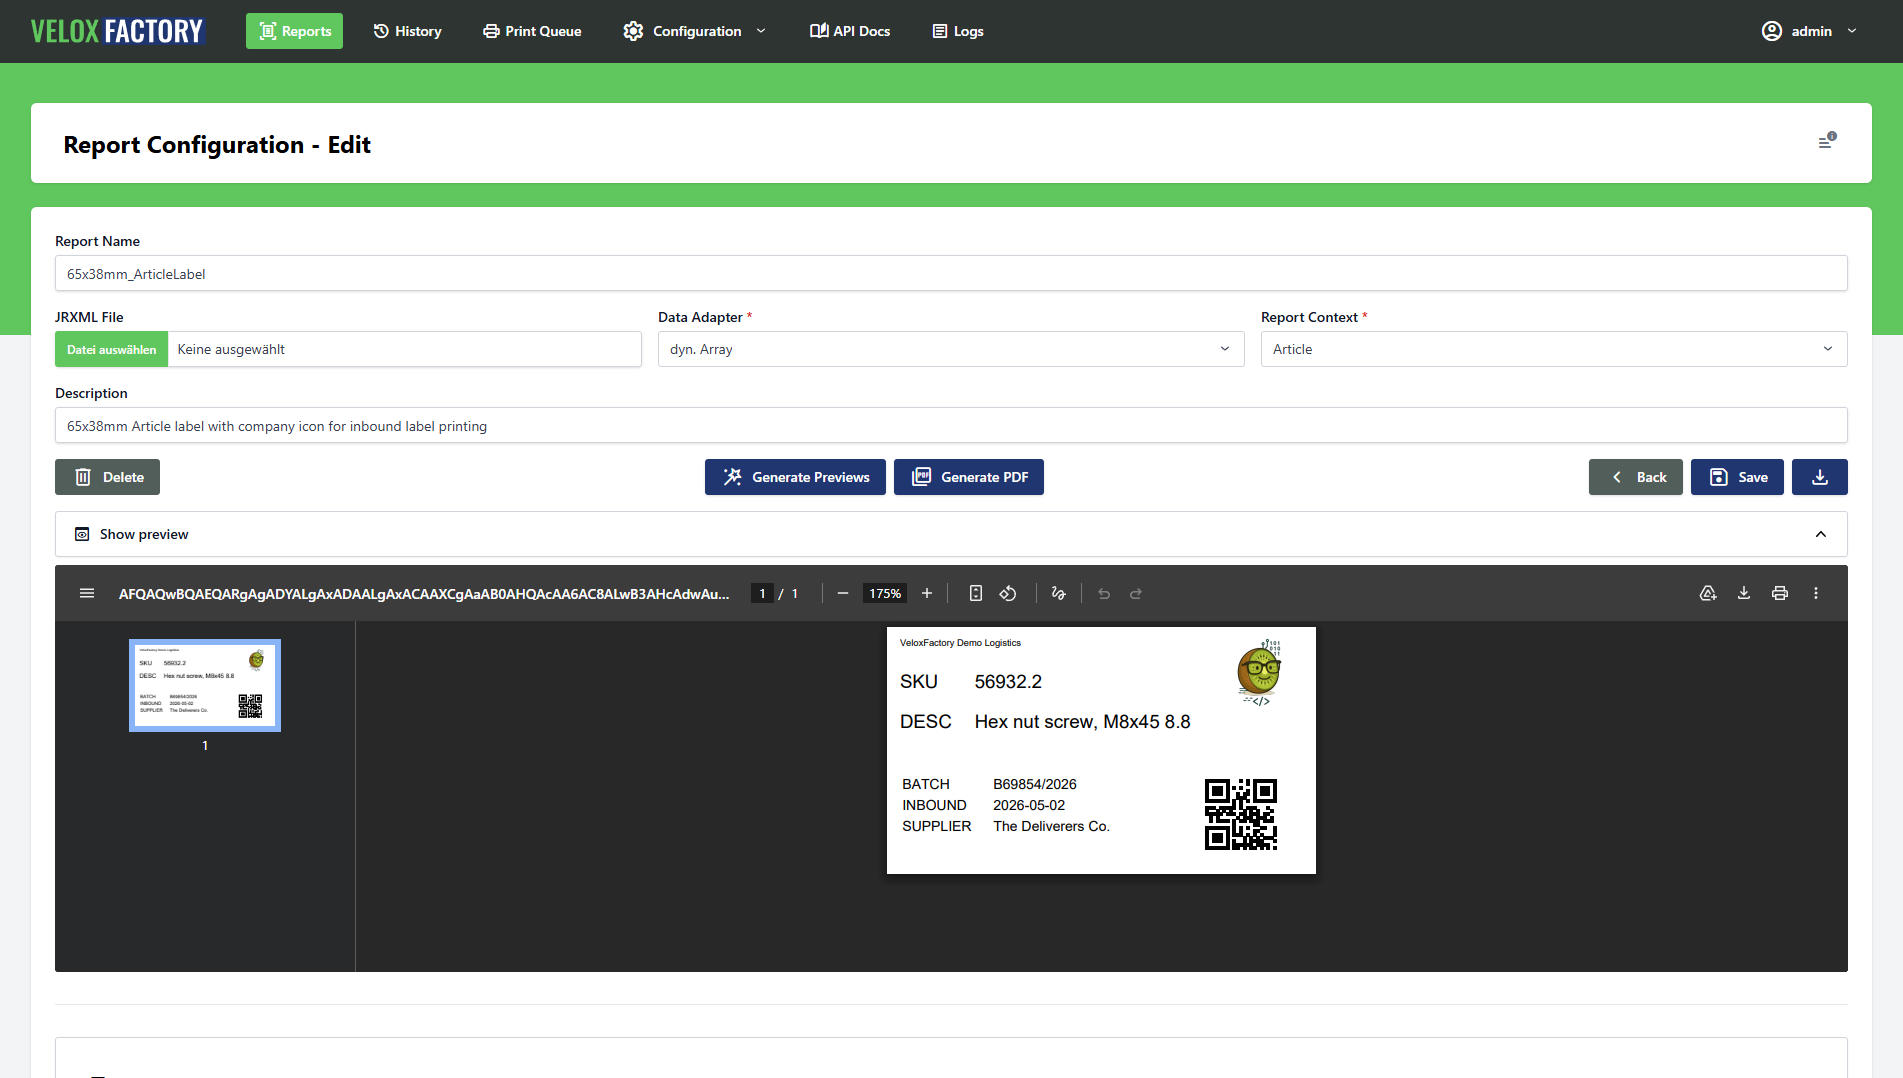
Managing reports in VeloxFactory
A report in VeloxFactory is more than a file. It is a fully managed configuration — with its own parameters, data fields, image resources, SQL query, data connection, preview images, rendering history, and print records. This page walks through the complete lifecycle of a report configuration, from upload to print.
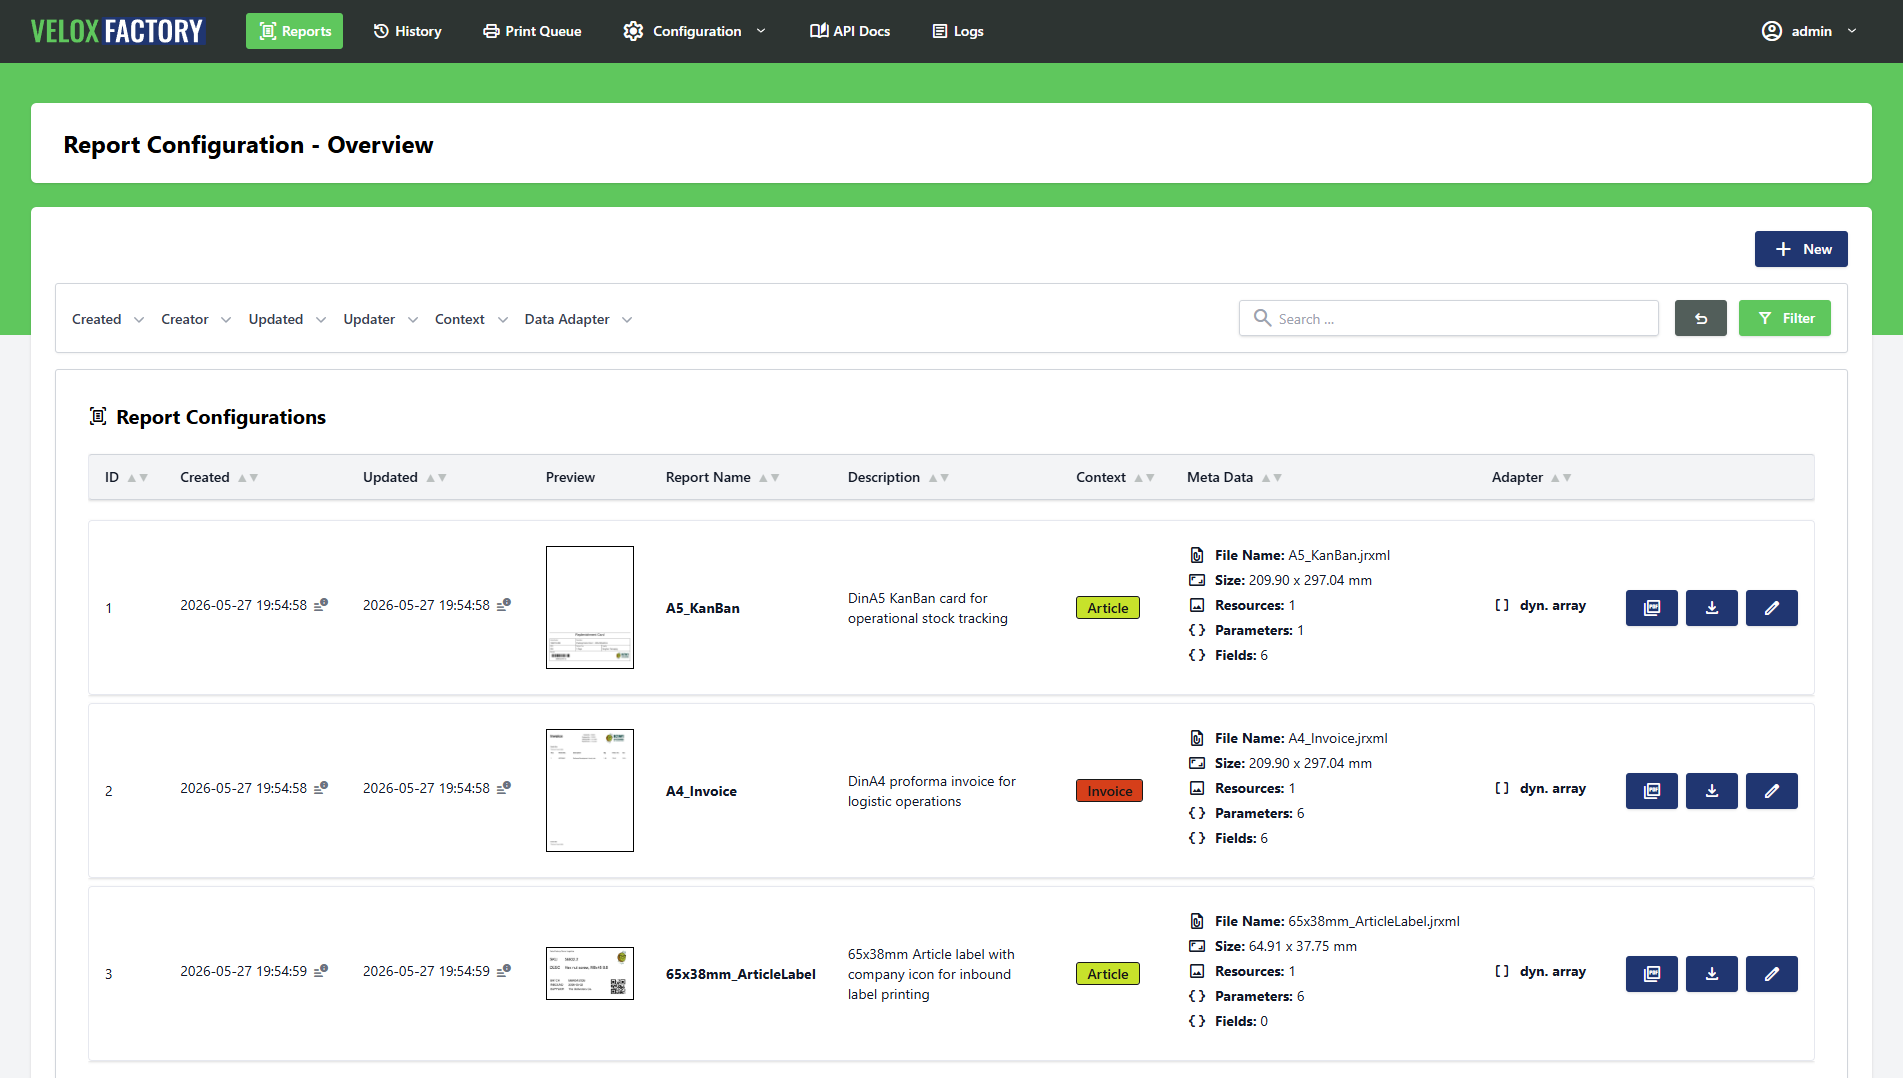
The ReportConfig — Central Master Data
The ReportConfig is the core entity in VeloxFactory. Every report you manage is a ReportConfig record, and everything else in the system either belongs to it or references it. A single ReportConfig brings together:
- The
.jrxmltemplate file stored on disk - Its parameters — input values passed at render time
- Its fields — data columns that populate the detail band
- Its resources — graphic assets (images, logos) embedded in the template
- Its SQL query — defined and managed directly in VeloxFactory
- Its data connection — the live database to query (optional)
- Its context — an organisational label for grouping
- Its preview and thumbnail images — generated from example data
Nothing renders without a ReportConfig. Nothing prints without one either. It is the starting point for every operation in VeloxFactory.
The Report Configuration Lifecycle
Upload .jrxml
     │
     ▼
Auto-analysis
(parameters, fields, resources detected and created)
     │
     ▼
Complete the configuration
(upload resource files, set example values, write SQL query, assign connection)
     │
     ▼
Generate preview
(renders with example data, stores preview + thumbnail)
     │
     ▼
Ready to render
Each step is described in detail below.
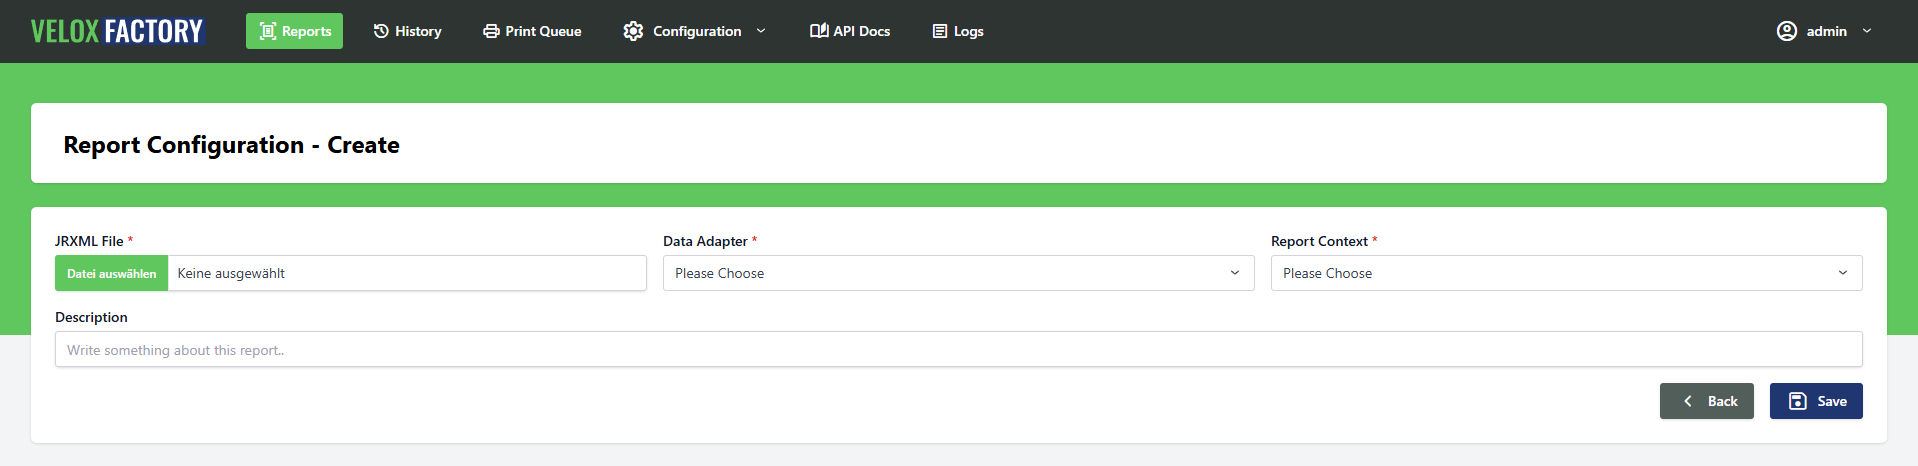
Uploading a Report
When you upload a .jrxml file, VeloxFactory immediately analyses it and builds the initial configuration automatically. The following is extracted from the file:
- Report name — from the
nameattribute on<jasperReport>. Must be unique. - Page dimensions — width and height, converted from Jasper pixels to millimetres.
- Detail band presence — whether the report has a repeating data section.
- Parameters — all non-resource parameters, including their data types and any
exampleValue/requiredcustom properties set in the.jrxml. - Fields — all data fields, including their data types and
exampleValuecustom properties. - Resources — all parameters following the
P_RESOURCE_naming convention (image assets).
The result is a fully structured ReportConfig record with all its child records in place — but not yet complete. Resource files still need to be uploaded, and the SQL query still needs to be written if a live data connection is used.
ReportConfig with the same report name or the same file name already exists.
Completing the Configuration
After upload, the report configuration is ready but not yet fully operational. The following steps complete it:
Upload Resource Files
If the report contains image resources (detected as P_RESOURCE_ parameters), each one requires an actual file to be uploaded. VeloxFactory cannot render the report until all resource files are in place.
Alternatively, a resource can be linked to a CommonReportResource — a shared asset reused across multiple reports, such as a company logo. Linking is permanent: the resource's own file is deleted and the common file is used in its place.
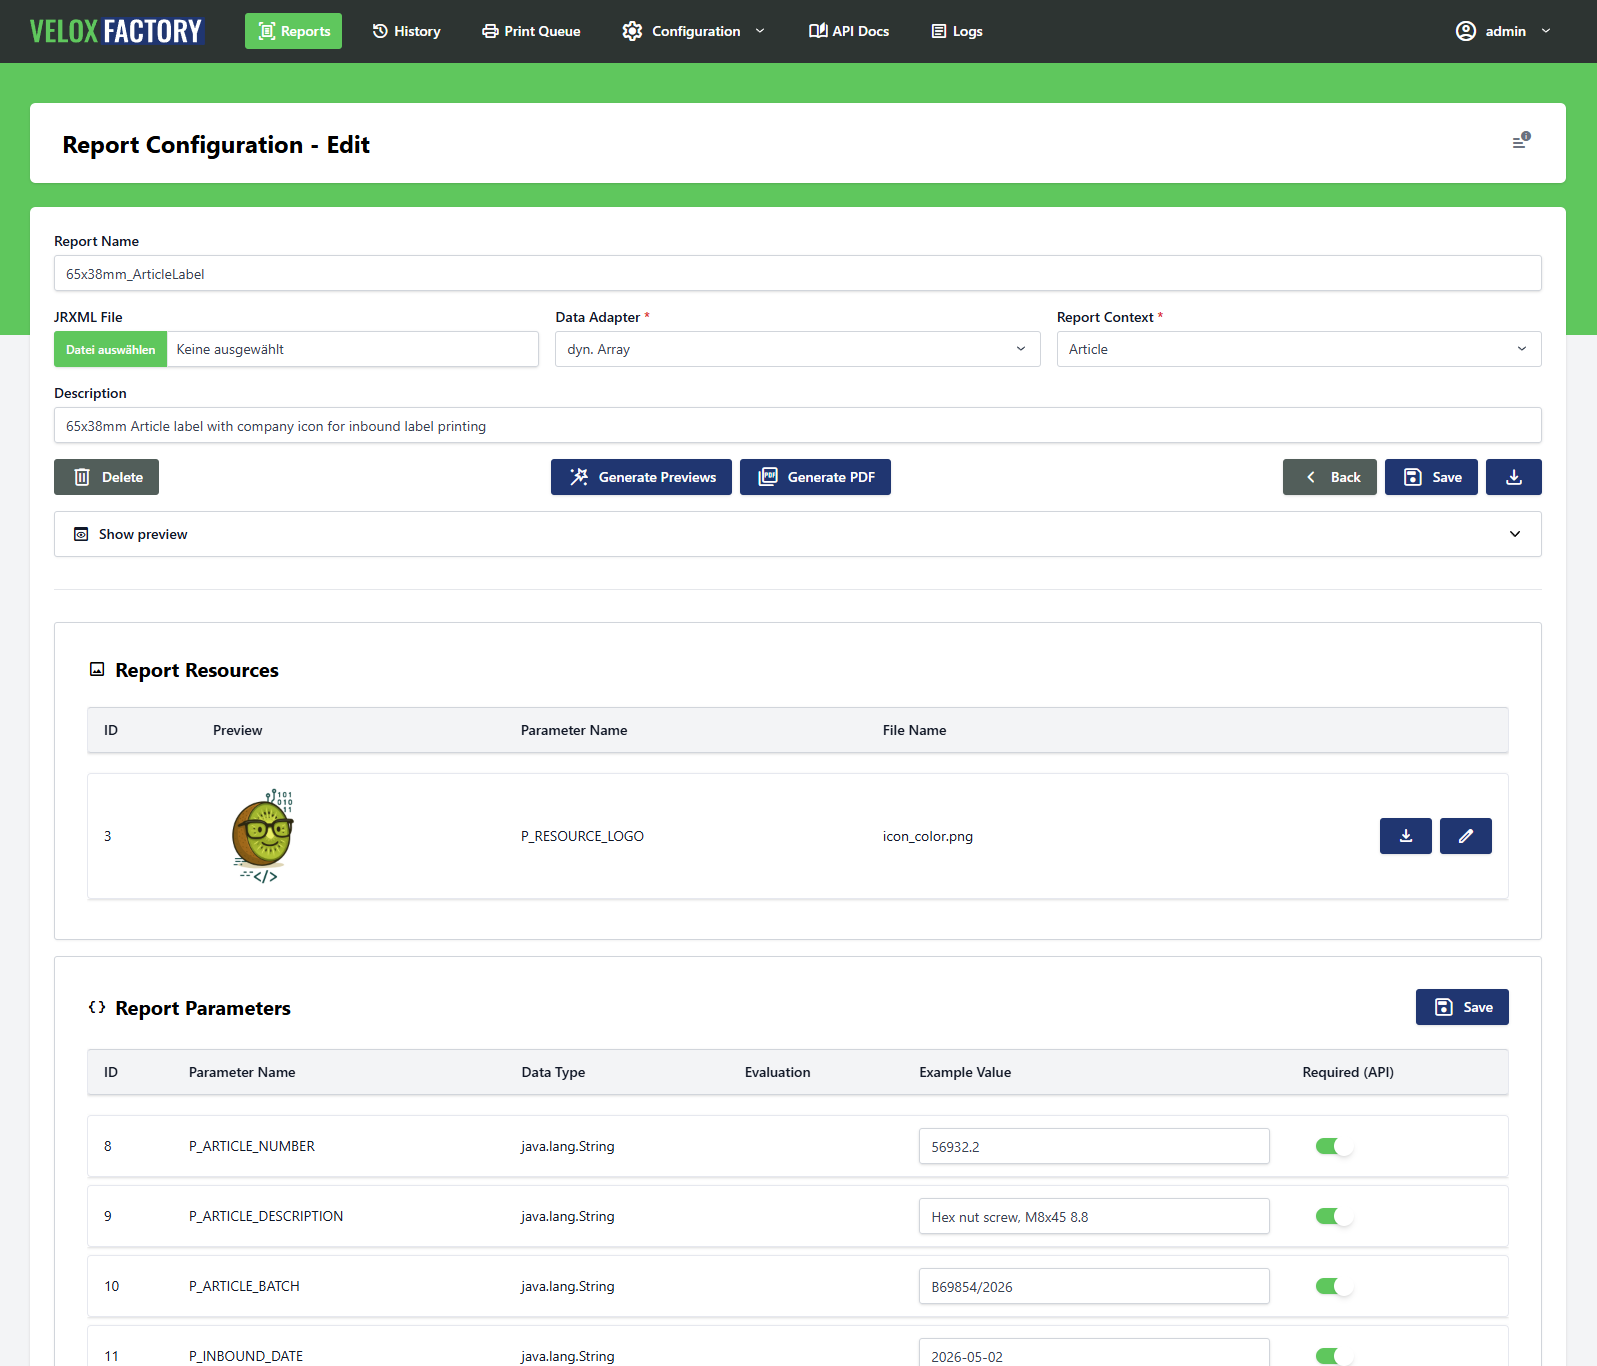
Review Parameters and Fields
VeloxFactory picks up exampleValue and required custom properties from the .jrxml automatically on upload. If these were not set in Jaspersoft Studio, or if you need to adjust them, you can do so directly in the configuration.
Every parameter and field should have an example value set before generating a preview.
Write the SQL Query and Assign a Connection
If the report fetches live data from a database, assign a ReportConnectionConfig and write the SQL query in the Query field. The query is stored in VeloxFactory — not in the .jrxml.
Parameters are available as named bindings in the query (:PARAMETER_NAME). See Creating reports in Jaspersoft Studio for details on how parameter binding works.
A connection is not required if the report has no detail band, or if data will be delivered in the render request itself.
Generating a Preview
Once all resource files are uploaded and all parameters and fields have example values, you can generate a preview. VeloxFactory renders the report using the stored example values — no live data needed — and stores the result as a base64-encoded PDF and a thumbnail image on the ReportConfig.
The preview is used in the report list as a visual card and as a quick sanity check that the template renders correctly. It is also what the useExampleValues flag triggers during a render request — useful for testing without providing real data.
Report History Records
Every render request can optionally create a ReportHistoryRecord — a full log entry of what was requested and what was returned. This is controlled by the createHistoryRecord flag in the render request body and is off by default.
When enabled, the history record captures:
- The exact request payload sent to the render endpoint
- The full API response
- The rendered PDF (Base64-encoded)
- A thumbnail of the first page (generated asynchronously in the background)
- The rendering status (
ok,render_fail,error,unknown) - The trace ID for cross-referencing with logs
History records are valuable for traceability — you can see exactly what was rendered, when, with what data, and what the result was. From a history record, you can also dispatch a reprint directly.
When to Skip History Records
History records are entirely optional. There are two good reasons to leave them off:
Performance and storage. Storing the full PDF, request payload, and response for every render adds up. For high-frequency rendering where traceability is not needed, skipping history records keeps the database lean.
Data sensitivity. A history record stores the complete render payload — including all parameters and data passed to the report. If that data is sensitive (personal data, financial figures, medical information), you may not want it persisted on the server at all. Omitting createHistoryRecord from the render request ensures nothing is logged.
Retention
History records are automatically purged after a configurable number of days. The retention period is set via the PURGE_HISTORY_DAYS environment variable (default: 30 days). Purging runs automatically as a background job — no manual intervention required.

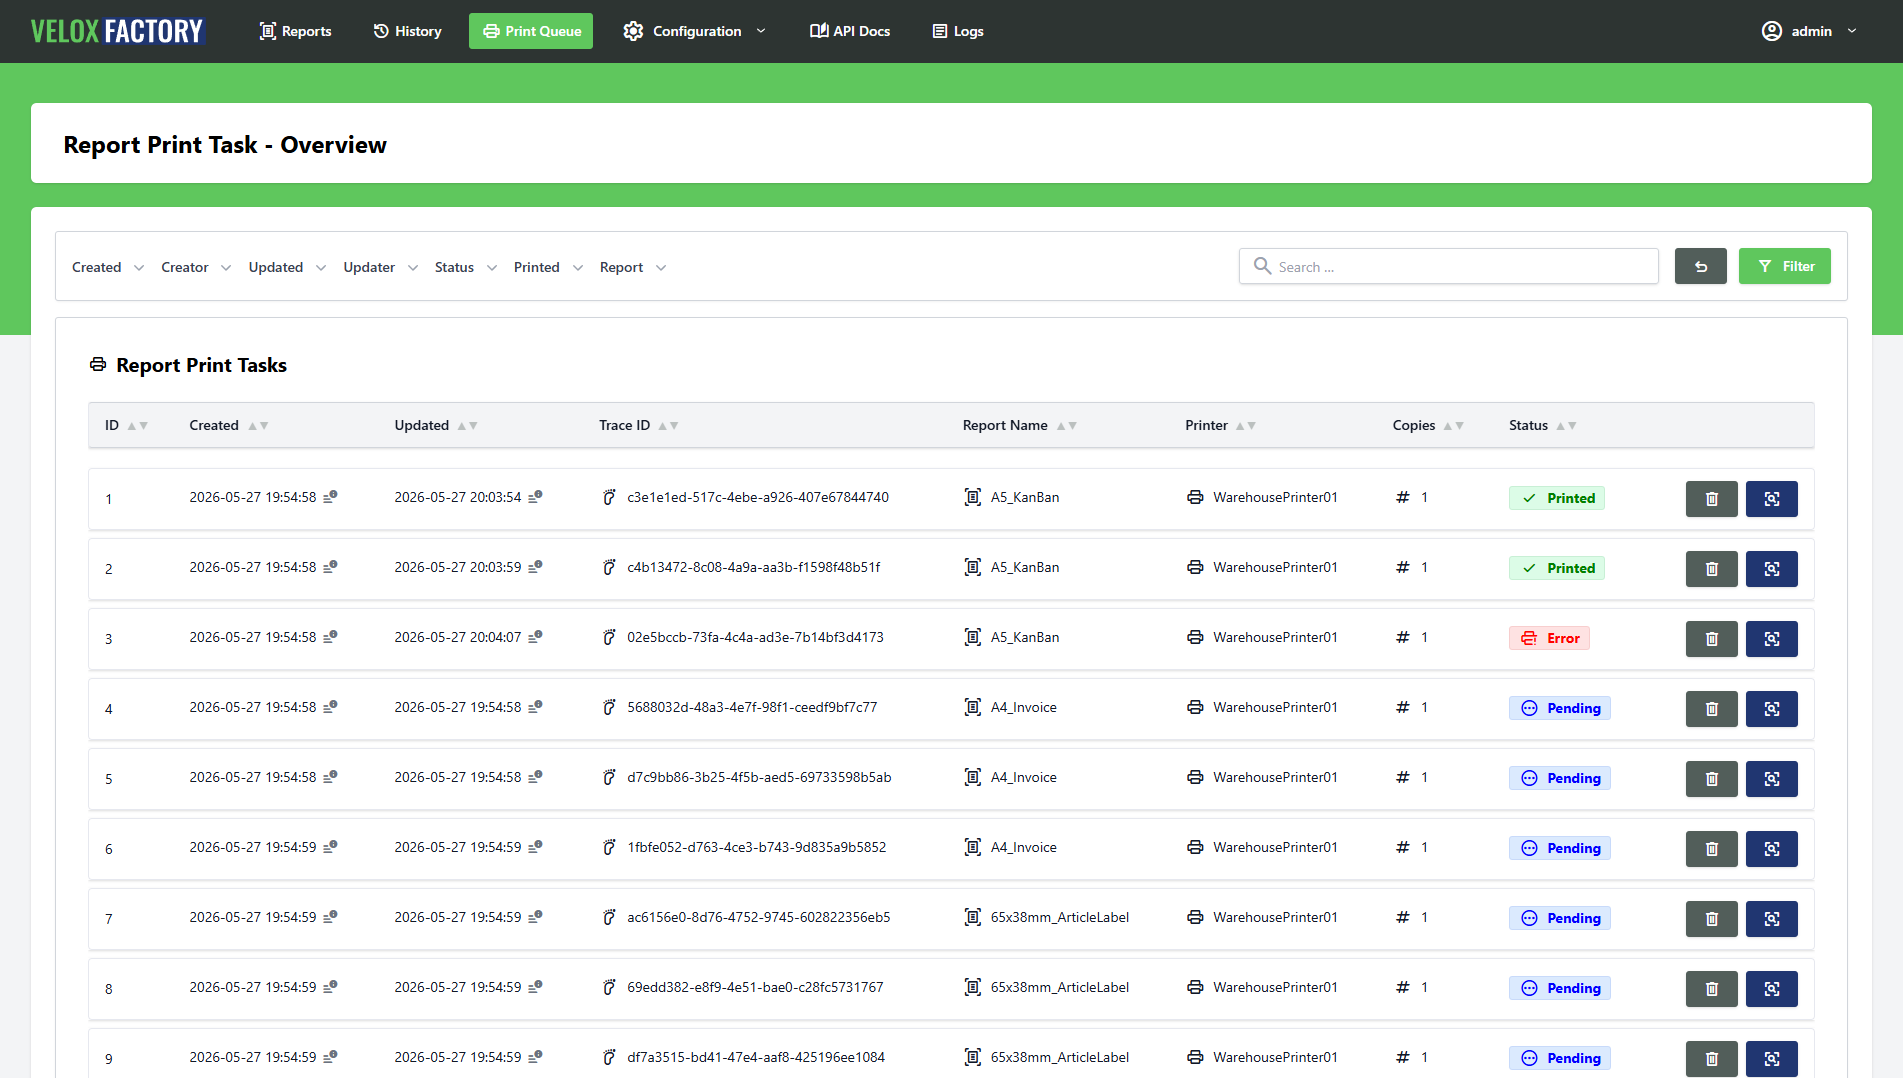
Report Print Tasks
A ReportPrintTask sends a rendered PDF to a physical printer. Print tasks are created as part of a render request — you render and dispatch to a printer in a single call — by setting createPrintTask: true and providing a printerName.
Print tasks are always linked to a ReportHistoryRecord. This means creating a print task also creates a history record (regardless of whether createHistoryRecord is explicitly set), so the printed document is always traceable.
How Printing Works
VeloxFactory does not communicate with printers directly. Instead, it creates a ReportPrintTask record and notifies a separate print service — a lightweight C# application running on or near the target machine — which picks up the task and executes the print job.
There are two modes of delivery:
WebSocket (push). If a broadcastId is included in the render request, VeloxFactory broadcasts a ReportPrintTaskCreated event via WebSocket (Laravel Reverb) the moment the task is created. The print service subscribes to that channel and reacts immediately. This is the recommended mode for real-time printing — the task reaches the printer within milliseconds of the render completing.
Polling (pull). Without a broadcastId, no broadcast is sent. The print service must poll the API for new tasks in pending status. This works fine for less time-sensitive workflows.
Print Task Status
| Status | Meaning |
|---|---|
| pending | Created, waiting for the print service to pick it up |
| printed | Print job executed and confirmed by the print service |
| error | Print service reported a failure |
| unknown | Status could not be determined |
The print service reports status back to VeloxFactory via the API after executing the job. The error_message field on the task record contains the failure detail if printing did not succeed.
Copies
The numberOfCopies field is passed to the print service as the requested number of printed copies. It defaults to 1 if not specified. VeloxFactory always renders the PDF exactly once — the print service is responsible for duplicating the output on the printer side.
PURGE_PRINTTASKS_DAYS days (default: 30). Like history record purging, this runs in the background without any manual action.
Deleting a Report Configuration
A ReportConfig can only be deleted when no ReportHistoryRecord or ReportPrintTask references it. VeloxFactory will reject a deletion request while any such records exist.
When a ReportConfig is deleted, the following is removed along with it: the .jrxml file from disk, all resource files, and all parameter and field records. The deletion is atomic — if any step fails, the entire operation is rolled back.
Data adapters for dyn. data control
Reports that display repeating data — lists, tables, card grids — need a data source. VeloxFactory supports two ways to supply that data at render time: a live SQL connection that queries a database automatically, or a dynamic array delivered directly in the render request. Understanding when to use which approach, and how each one works, is key to getting the most out of VeloxFactory.
Two Approaches, One Result
| SQL Connection | Dynamic Array | |
|---|---|---|
| Data source | Live database, queried at render time | JSON array in the render request body |
| Who fetches the data? | VeloxFactory | The calling application |
| Connection config needed? | Yes | No |
| SQL query needed? | Yes | No |
| Best for | Reports where VeloxFactory has direct DB access | Reports where the caller already has the data |
Both approaches produce the same result: a populated report. The choice depends on where your data lives and who is best placed to retrieve it.
Reports without a detail band — purely static layouts driven by parameters — need neither.
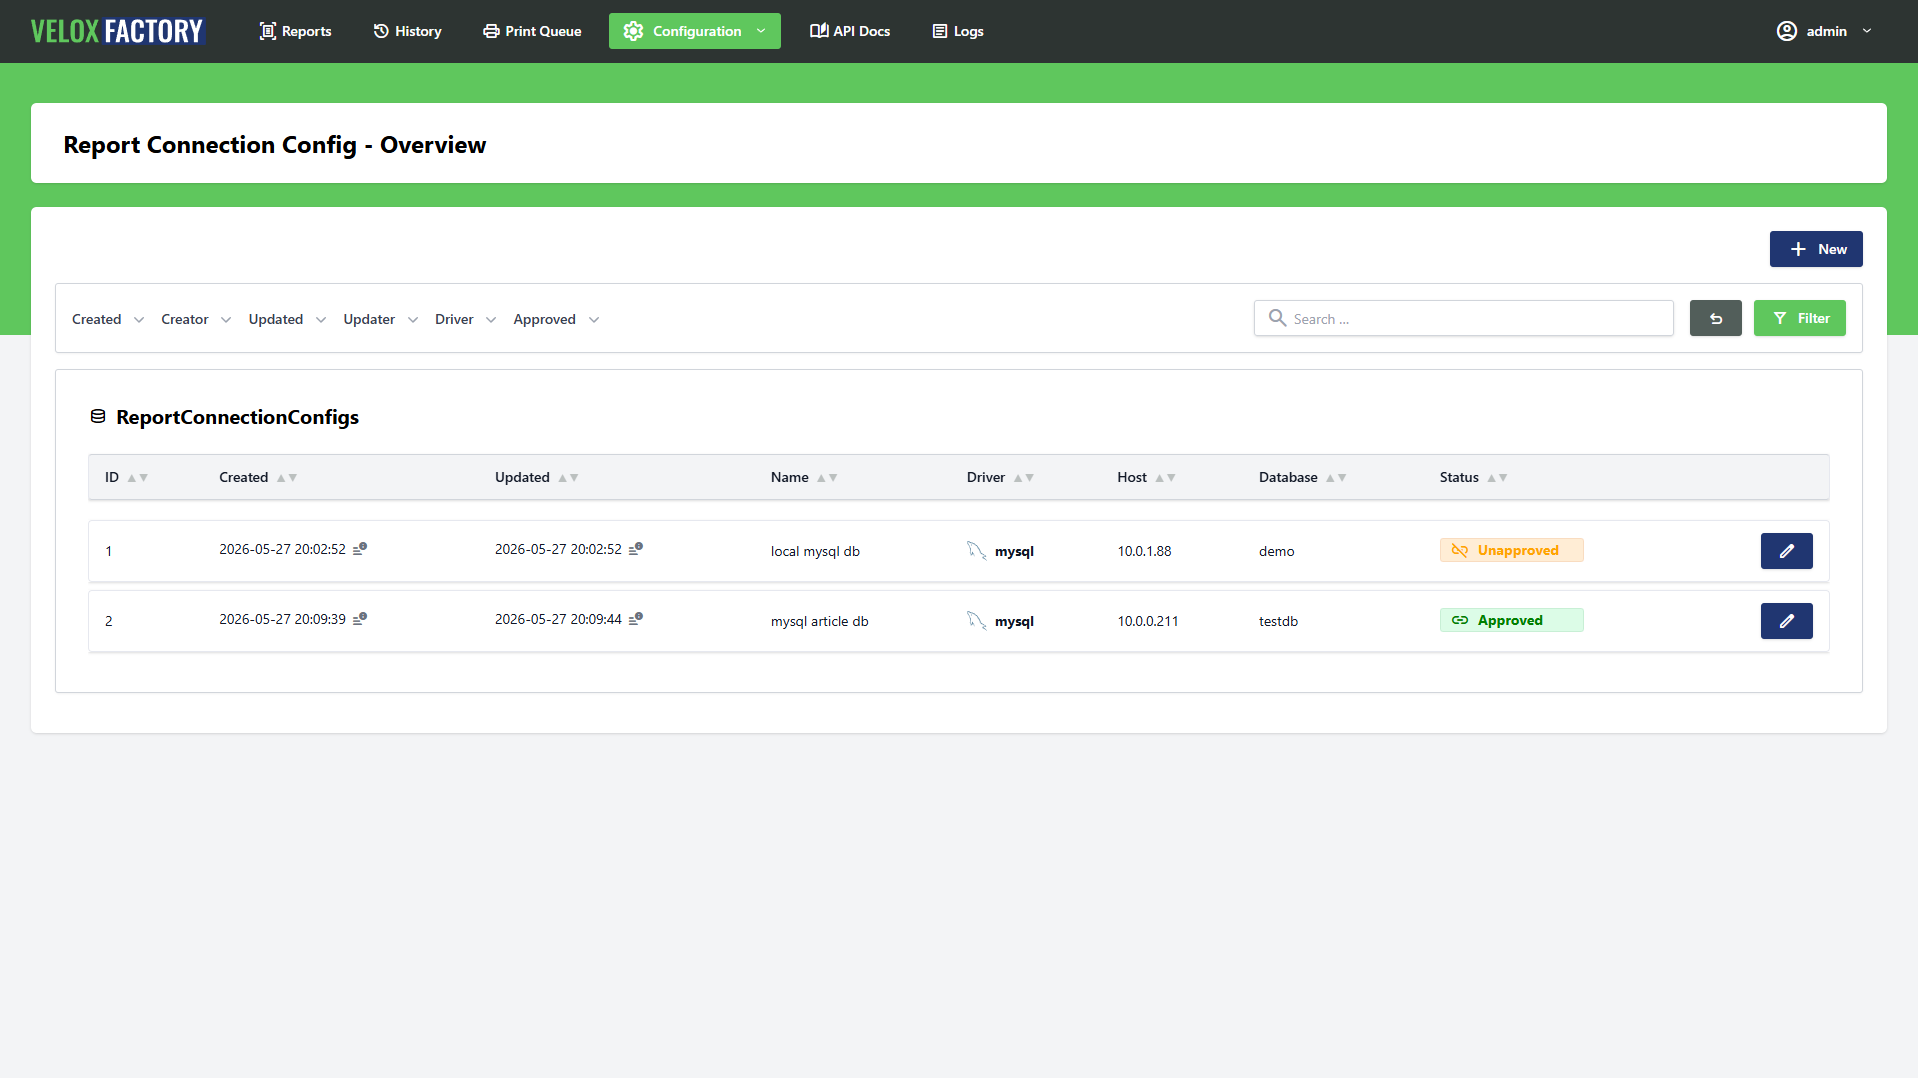
SQL Connections
A ReportConnectionConfig defines a live database connection that VeloxFactory uses to fetch data at render time. When assigned to a ReportConfig, VeloxFactory executes the configured SQL query against that connection, takes the result rows, and feeds them as field data into the report.
Setting Up a Connection
A connection config holds the credentials and driver settings for one database. Supported drivers are MySQL, MariaDB, PostgreSQL, and Microsoft SQL Server.
Before a connection can be assigned to a report, it must be tested and approved. VeloxFactory runs a test query against the database to verify connectivity — only connections with a passing test are available in the ReportConfig assignment dropdown.
Writing the SQL Query
The SQL query is written and stored in VeloxFactory — not in the .jrxml. It lives on the ReportConfig record and is executed against the assigned connection at render time.
The query must return columns whose names match exactly the field names defined in the .jrxml. For a report with fields articleNumber, description, and moq, the query must alias its columns accordingly:
SELECT
    art_no          AS articleNumber,
    art_description AS description,
    min_order_qty   AS moq,
    delivery_days   AS deliveryTime,
    supplier_name   AS supplier,
    barcode
FROM articles
ORDER BY art_no ASC
Column names are case-sensitive. articleNumber and articlenumber are not the same field.
Using Parameters as SQL Variables
Parameters passed in the render request are available as named bindings in the SQL query using the :PARAMETER_NAME syntax. VeloxFactory scans the query for :name placeholders before execution and binds only the parameters that are actually referenced — extras are silently ignored.
This makes it straightforward to filter, sort, or paginate the result set based on render-time input:
-- Filter by article number
SELECT
    art_no          AS articleNumber,
    art_description AS description,
    min_order_qty   AS moq
FROM articles
WHERE art_no = :P_ARTICLE_NUMBER
-- Date range filter with two parameters
SELECT
    order_id        AS orderId,
    customer_name   AS customerName,
    order_date      AS orderDate,
    total_amount    AS totalAmount
FROM orders
WHERE order_date BETWEEN :P_DATE_FROM AND :P_DATE_TO
ORDER BY order_date ASC
-- Wildcard search
SELECT
    art_no          AS articleNumber,
    art_description AS description
FROM articles
WHERE art_description LIKE CONCAT('%', :P_SEARCH_TERM, '%')
The render request for the date range example would look like this:
POST /api/v1/report-config/OrderList/render

{
  "outputType": "base64",
  "parameters": {
    "P_DATE_FROM": "2024-01-01",
    "P_DATE_TO":   "2024-03-31"
  },
  "data": [],
  "createHistoryRecord": true,
  "createPrintTask": false
}
Parameter Promotion from Query Results
There is a powerful pattern worth knowing: if a SQL result column has the same name as a registered parameter on the report, VeloxFactory automatically promotes that value from the data rows into the parameters map — before the report renders.
This means you can derive parameter values directly from the database without having to pass them in the render request. The query does the lookup; the result feeds both the detail band and the header parameters in a single call.
Consider a report that prints a picking list for a warehouse order. The header shows the order number, the customer name, and the warehouse location — all parameters. The detail band shows the individual line items — fields. Normally you would have to fetch the order header separately and pass it as parameters. With parameter promotion, a single query can deliver everything:
-- First row drives the header parameters, all rows drive the detail band.
-- P_ORDER_NUMBER, P_CUSTOMER_NAME, and P_WAREHOUSE match registered parameter
-- names and will be promoted automatically. The remaining columns stay as field data.

SELECT
    o.order_number      AS P_ORDER_NUMBER,
    c.customer_name     AS P_CUSTOMER_NAME,
    w.location_code     AS P_WAREHOUSE,
    ol.sku              AS sku,
    ol.description      AS description,
    ol.quantity         AS quantity,
    ol.bin_location     AS binLocation
FROM orders o
JOIN customers c   ON c.id = o.customer_id
JOIN warehouses w  ON w.id = o.warehouse_id
JOIN order_lines ol ON ol.order_id = o.id
WHERE o.order_number = :P_ORDER_NUMBER
ORDER BY ol.bin_location ASC
The render request only needs the order number:
POST /api/v1/report-config/PickingList/render

{
  "outputType": "base64",
  "parameters": {
    "P_ORDER_NUMBER": "ORD-2024-00451"
  },
  "data": [],
  "createHistoryRecord": true,
  "createPrintTask": false
}
VeloxFactory executes the query, detects that P_ORDER_NUMBER, P_CUSTOMER_NAME, and P_WAREHOUSE match registered parameter names, moves their values from the first data row into the parameters map, and renders the report with a populated header and a fully populated detail band — all from one query, one request.
Dynamic Array
When no ReportConnectionConfig is assigned, VeloxFactory expects the data to arrive in the render request itself — as a JSON array in the data field. Each object in the array represents one row in the detail band, with keys matching the field names defined in the .jrxml.
This approach is ideal when the calling application already has the data in memory, when the data comes from a source VeloxFactory cannot connect to directly, or when the data structure is too dynamic to express in a fixed SQL query.
A complete render request with inline data looks like this:
POST /api/v1/report-config/A5_KanBan/render

{
  "outputType": "base64",
  "parameters": {
    "P_ARTICLE_NUMBER": "4561287-154"
  },
  "data": [
    {
      "articleNumber": "4561287-154",
      "description":   "Packing Carton Size 1 - 200x150x50mm",
      "moq":           250,
      "deliveryTime":  "3 Days",
      "supplier":      "Ninghao Packaging",
      "barcode":       "5698532145712"
    }
  ],
  "createHistoryRecord": false,
  "createPrintTask": false
}
For reports that print one item per page, the data array typically contains a single object. For list or table reports, it contains one object per row.
.jrxml. A field declared as java.lang.Integer expects a JSON number, not a string. Pass values in their native JSON type — numbers as numbers, booleans as booleans.
Static Reports — No Data Needed
Reports without a detail band require neither a connection config nor a data array. The entire output is driven by parameters alone. Common examples: cover pages, certificates, summary headers, QR code labels, or any document where the layout is fixed and all variable content comes from a handful of input values.
For these reports, the render request simply omits data entirely:
POST /api/v1/report-config/CertificateOfConformity/render

{
  "outputType": "url",
  "parameters": {
    "P_PRODUCT_NAME":   "Industrial Bearing 6205-2RS",
    "P_BATCH_NUMBER":   "BAT-2024-0077",
    "P_ISSUE_DATE":     "2024-03-15",
    "P_INSPECTOR_NAME": "M. Fischer"
  },
  "createHistoryRecord": true,
  "createPrintTask": false
}